
This post was most recently updated on January 18th, 2022
In this article: I’m sharing my best IKEA assembly troubleshooting and tips! I’m dishing out 4 simple rules that will help your IKEA project go smoothly. In addition, you’ll learn how to easily troubleshoot 5 common mistakes made when assembling IKEA furniture. If you are about to begin assembly of any IKEA furniture, be sure to read this article first. (Note: This post is not sponsored by IKEA. I’m simply sharing my knowledge to help you out.)
We’ve all been there, right? You’ve just snagged an IKEA furniture piece you’ve had your eye on. And, you can barely contain your excitement as you lug the carton into the house. Just think of how life changing all that new storage will be! But, then. You. Open. The. Box. Have mercy. You swear there’s 69 boards, 872 screws, and too many nuts and bolts to count. Immediately, your IKEA furniture assembly dread sets in.

There’s Nothing More Humbling than IKEA Furniture Assembly
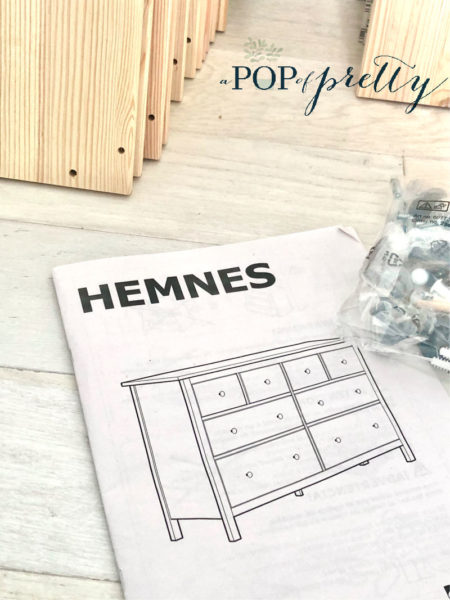
OK, that might be a slight exaggeration. But, truly, nothing can be more humbling than an IKEA furniture assembly project waiting to happen. In my experience, every IKEA project is daunting before you start. For instance, just recently, I assembled an IKEA Hemnes dresser for my son’s new room. And, even though this wasn’t my first IKEA assembly rodeo, I still felt overwhelmed at the sheer number of pieces in the box as you can see in this video:
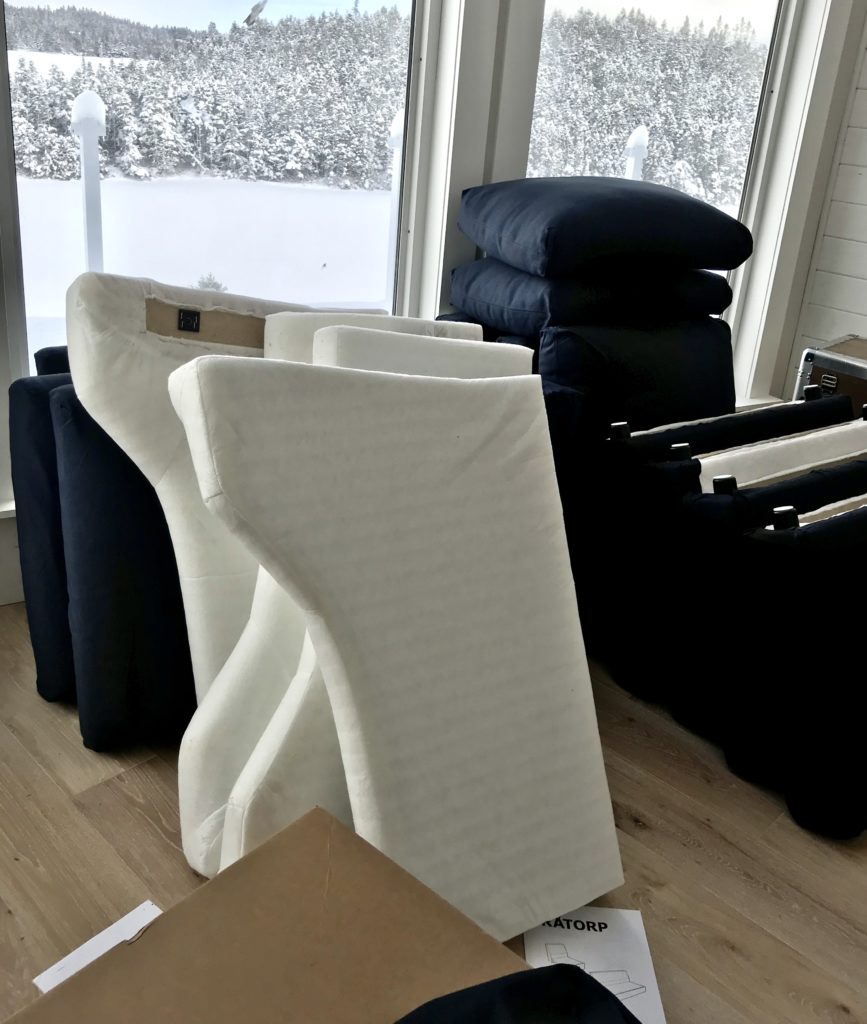
In the past, I’ve put together enough IKEA furniture to fill a warehouse. For example, I’ve assembled an IKEA Vimle (Finnala) sofa and loveseat, two IKEA Farlov chairs, and many Hemnes series pieces, like a TV stand, coffee table, bookshelf and nightstand. Plus, at least a gazillion Kallax shelving units. (Seriously, we have one in every room and closet!) And, after every IKEA assembly project, I say the same thing: I will NEVER EVER do it again. But then, 6 months later, I’m once again staring at a flat box of IKEA furniture and cursing under my breath.


IKEA Furniture Assembly Isn’t Hard, If You Follow 4 Rules
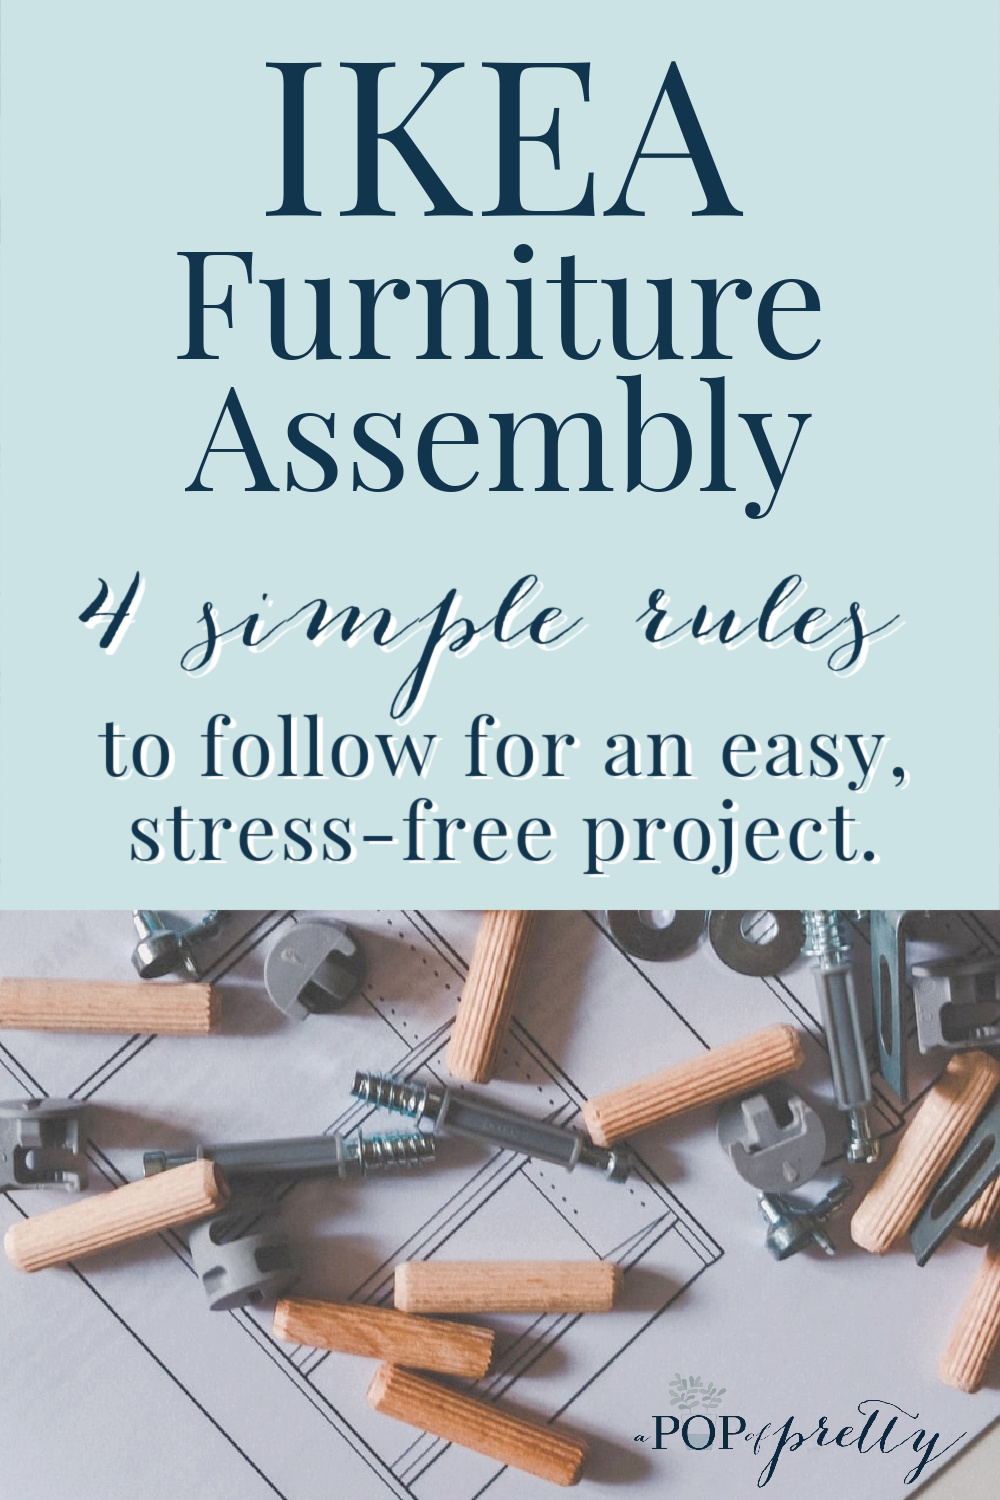
The truth is, assembly of IKEA furniture really isn’t that hard. Sure, it’s overwhelming when you open the box. But, if you are methodical about following the outlined assembly process, it will go pretty smoothly. In my opinion, there are 4 rules you MUST follow if you want your IKEA assembly project to run like clockwork.
Rule #1: Follow the IKEA instruction manual. (Duh.)
Sounds obvious, right? Yet, it always surprises me how many people attempt flat box furniture assembly by casually ‘winging it’. Listen to me: Please, for the love of God, DO NOT wing it. Don’t be a smarty pants or assume you know what comes next. And, don’t convince yourself that IKEA furniture assembly is easy. Or, my personal favourite, that the IKEA instruction manual must be wrong.

I can pretty much guarantee you that IKEA’s instructions are indeed right. And, how am I so sure about this? Because I’ve lived to regret this attitude more than once. And, do you really want to be like me, and undo half your work at Step 12 because you decided to become an Assembly Rambo at Step 4? Didn’t think so. So, please, follow the instructions in the right order, and exactly how they are described! I promise, the IKEA instruction manual won’t fail you!
Rule #2: Sort, sort, sort.
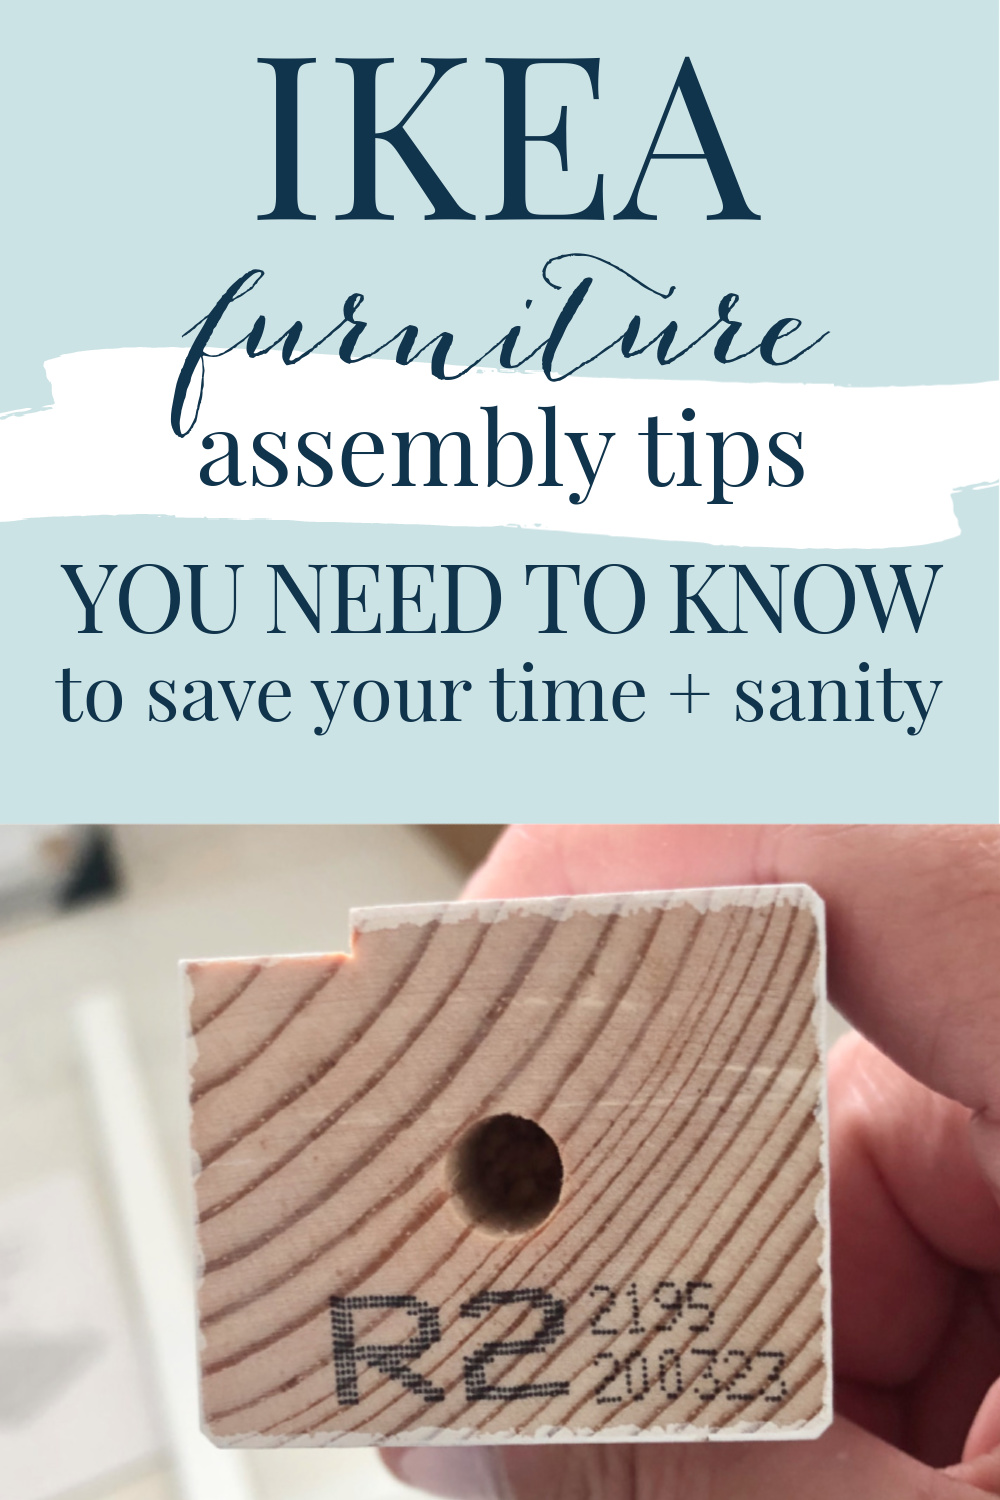
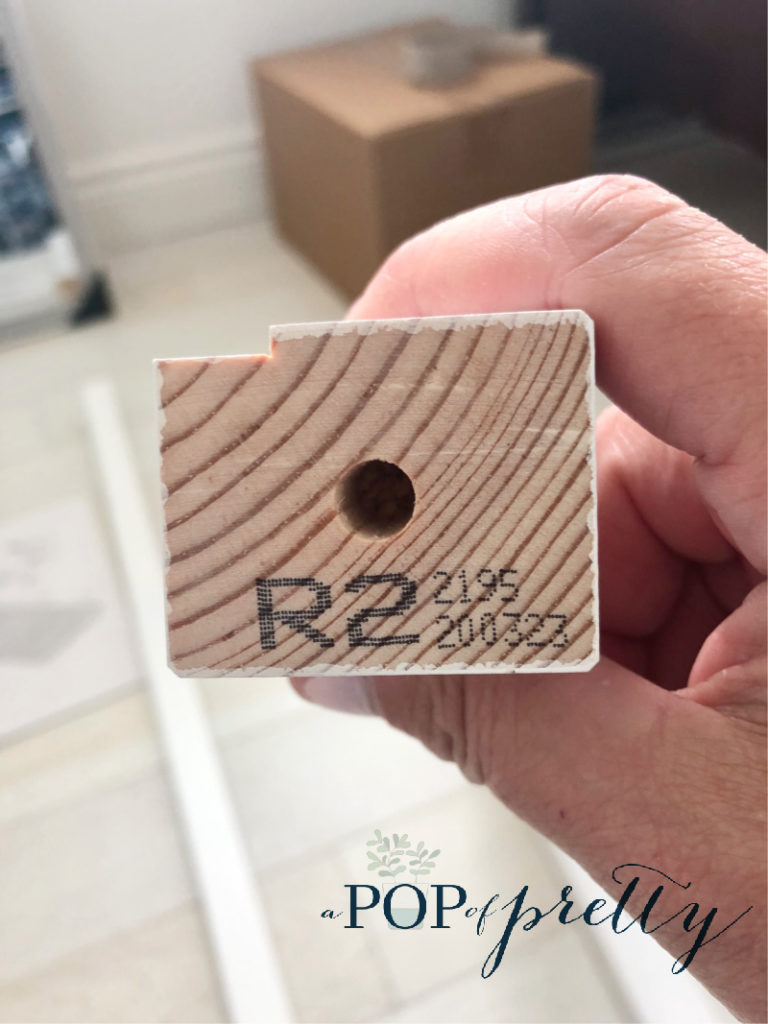
Next, any smooth IKEA assembly project starts with sorting! In this case, I’m talking specifically about the boards and wooden/laminate pieces. (I’ll address the hardware next.) Unfortunately, not all IKEA boards and pieces have an identifying codes on them to compare against the instructions. (Why, IKEA, why?) But, every so often, there will be a few pieces with codes like this one, which makes the process a lot easier.

Most times though, you’ll need to identify the pieces based on how they look – e.g., their (relative) sizes, the number and location of the holes, etc.. My advice is to start any IKEA furniture assembly party by sorting all the boards into identical bunches like these.
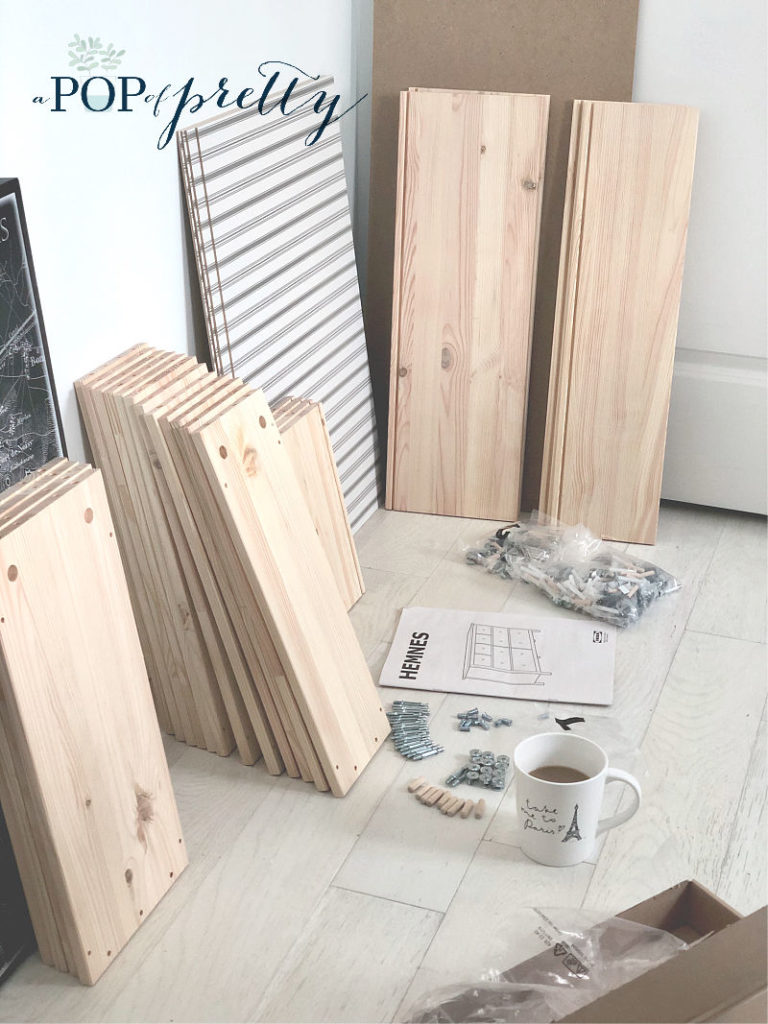
Study each board/piece meticulously, and place all the ones that are EXACTLY the same in a pile. Once you have that done, make sure that you have the right number of each. In other words, compare the quantities against what’s listed in the instructions. I promise you that this simple prep work will save you A LOT of time and frustration later.
Rule #3: Don’t Get Ahead of Yourself.
One of my best tips for IKEA assembly is not to get ahead of yourself. One good example of this with is the hardware. By ‘hardware’, I mean the bag(s) of screws, nuts, bolts, etc.. If you have a large IKEA furniture assembly project, you will likely have several numbered bags.
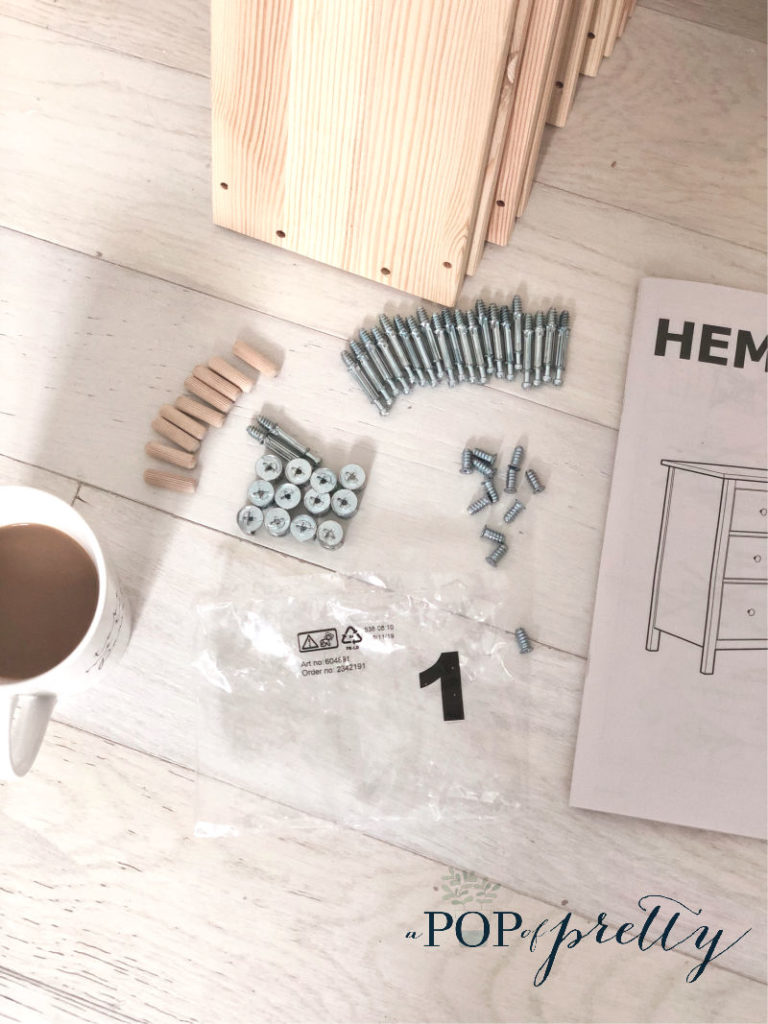
The bags are numbered for a reason! Do not open them all at once. If you do, you will become overwhelmed quickly. The instruction manual will tell you when each bag or hardware is required. And, when it does, just open that one bag. Then, organize all the identical hardware pieces into bunches. Plus, be sure you have the right quantities. Just like the board sorting step above, this simple organizational tip will help save your time and sanity later.
Rule #4: Always double check.
Have you heard the saying, Cut once, measure twice? Nothing could be more true when it comes to assembly of IKEA furniture. Double checking your work will save you SO much frustration. Even though I follow IKEA instruction manuals meticulously, I still make silly mistakes. And, those little mistakes can be absolutely BRUTAL time-wise, causing me to backtrack steps and disassemble much of my project.
Here’s a good example. The instructions for this part of the Hemnes dresser were a bit tedious. It took me a couple of tries to get the boards laid out EXACTLY like the instruction manual:

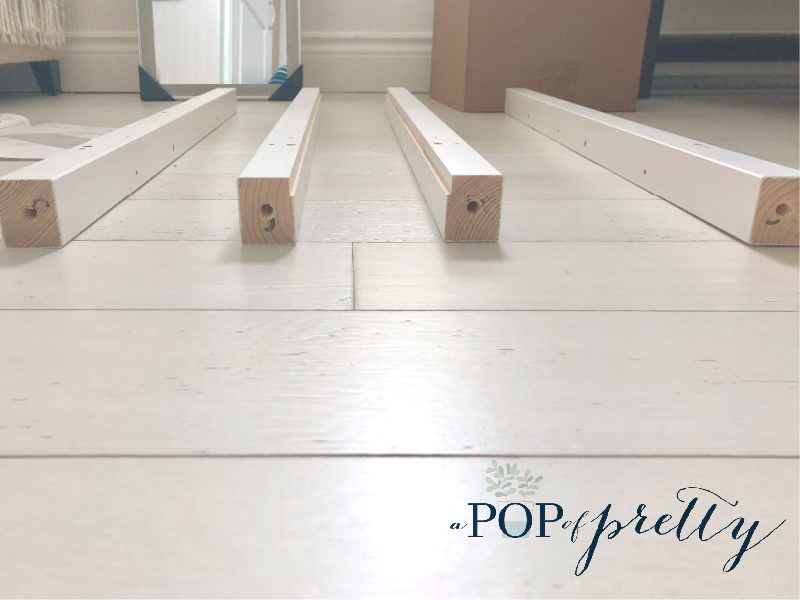
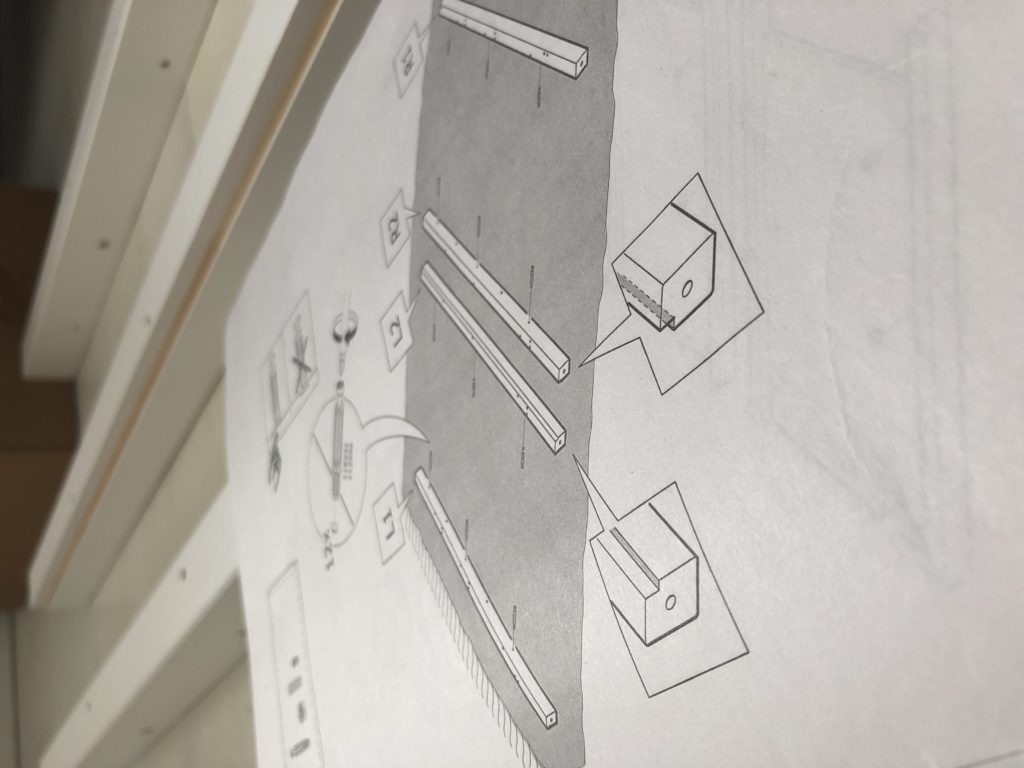
These experiences have taught me to ALWAYS double check before proceeding! You will save yourself time and frustration later by studying your work against the manual before moving on to the next step. For example, if there should still be empty holes in some of your boards, make sure those empty holes are all in the right locations.
5 IKEA Furniture Assembly Mistakes (and How to Easily Solve Them)
Even if you follow my 4 rules for easy IKEA furniture assembly, you’ll still likely make a few mistakes along the way. That’s why I’m also sharing 5 common IKEA assembly mistakes, and how you can easily troubleshoot them. By sharing these tips, I’m hoping your IKEA assembly project will go a lot more smoothly and quickly than some of mine have gone.
IKEA Assembly Mistake #1: You strip or crack a hole.
The Problem: Once you’ve widened a pre-drilled hole by stripping or cracking it, it’s difficult to fix it effectively. So, it’s best to avoid it entirely.
The Fix: To avoid stripping or cracking the wood around a hole, always hold your hardware firmly straight (not sideways) when inserting it into the pre-drilled hole.
The Fix: Secondly, don’t over-tighten your hardware! I always find it best to use a manual screwdriver (rather than a power tool like and electric screwdriver or drill) for an IKEA furniture assembly project. Let’s face it, while the quality of IKEA furniture is decent, it’s in the ‘affordable furniture’ category for a reason. In my experience, a lighter touch is always best.
Mistake #2: You jam a wooden dowel in the wrong hole.
The Problem: Jamming a wooden dowel in the wrong hole is easy to do while assembling IKEA furniture. IKEA often alternates these small wooden dowels with screws in every few holes, so unless you are counting the holes meticulously, it’s a common mistake. And, if you’ve hammered it in, it’s not always easy to get out without cracking it off.

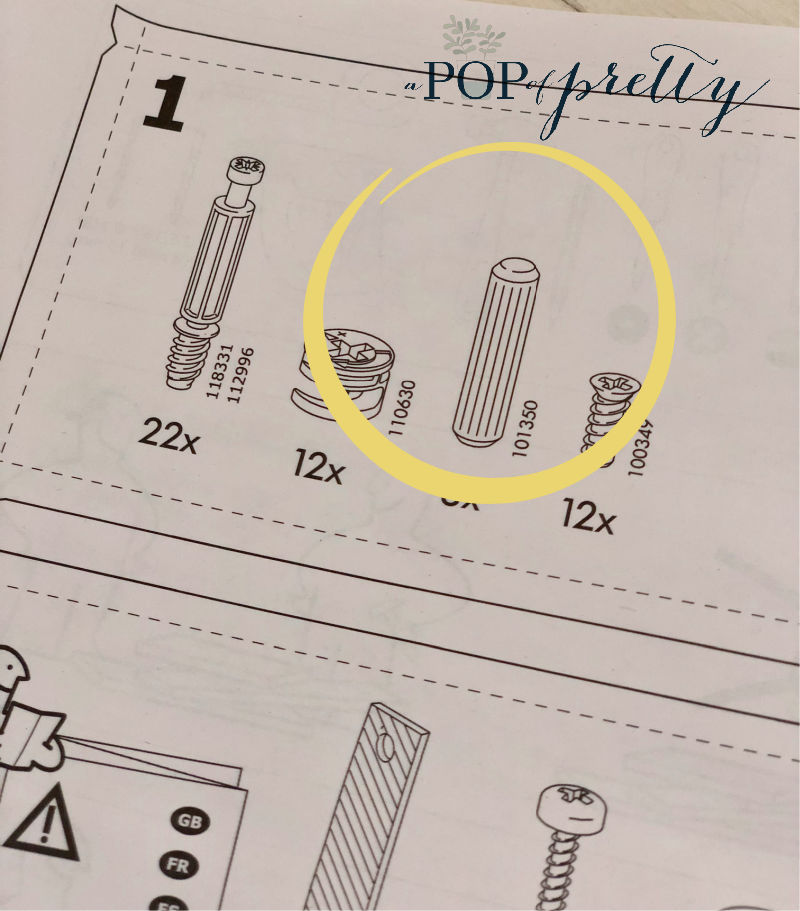
The Fix: To avoid this IKEA furniture assembly mistake, place wooden dowels lightly. In other words, don’t tap them in with a hammer or mallet. (They will eventually be secured when you tighten the other hardware.) This makes it much easier to remove a misplaced one.
The Fix: However, if you need to remove a jammed dowel, you can troubleshoot this mistake by using use a pair of pliers to get it out. You’ll need to be gentle, though. Otherwise you’ll crack it off in the hole, and this will take a lot more patience to remove. Plus, you’ll be down a dowel for your project, which means things won’t be as secure as they should be.
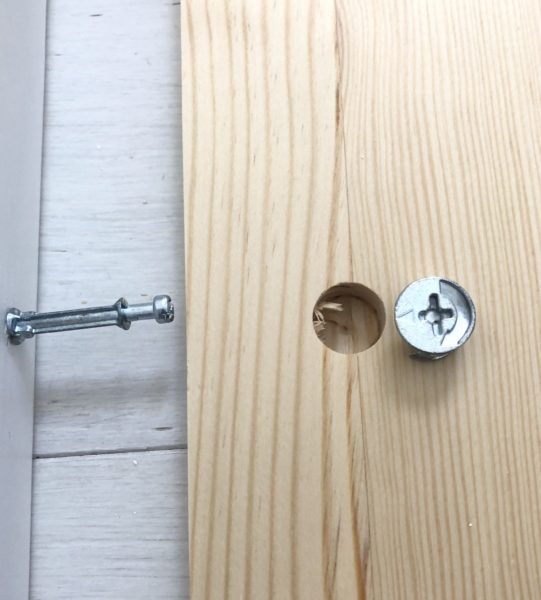
Mistake #3: You place a round cam lock fastener in upside-down, or, worse, in the wrong hole.
The Problem: Every IKEA furniture assembly project I’ve completed has used these round cam lock fasteners to secure boards together with screws. They are easy to use, but they can be a pain to get out if you place them upside-down or in the wrong hole. Luckily though, both are easy to troubleshoot.
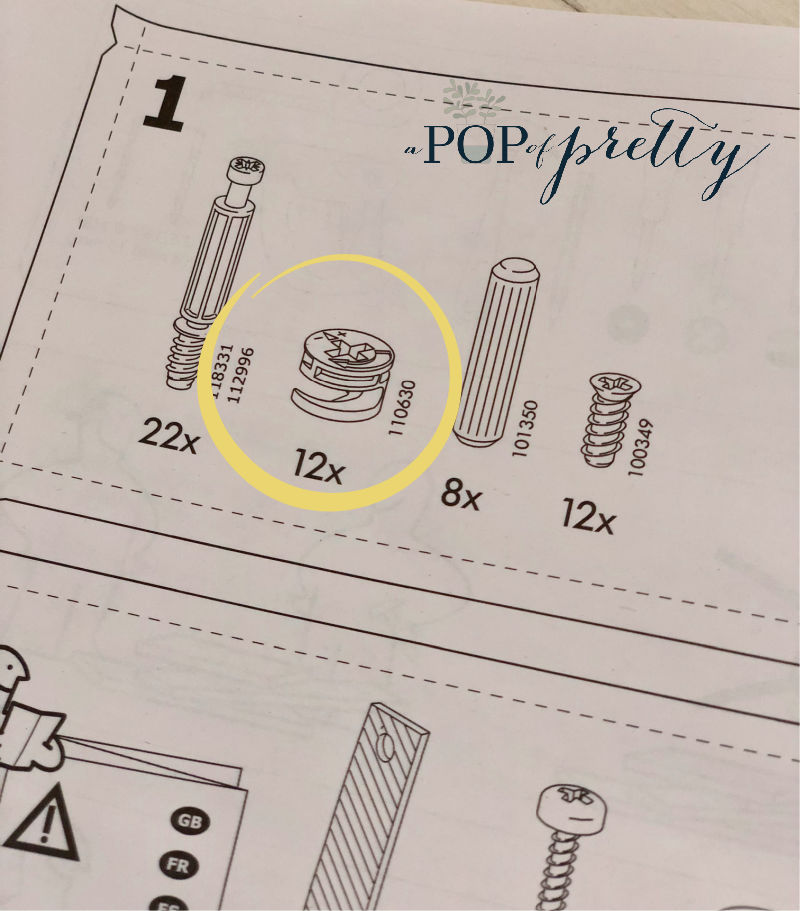
The Fix: If you look closely, you’ll see that each fastener has a little arrow head. The arrow head needs to be pointing towards the opening for the screw. If you place it upside-down (and the opening is facing away from the screw), you won’t be able to insert or tighten the screw. To avoid this mistake, make sure that the arrow (and, in turn, the opening) on the lock fastener is facing the screw. If it isn’t, use a Phillips screwdriver to turn the fastener until it is.

The Fix: A worse issue is if you’ve placed one if these fasteners in the wrong hole. They don’t come out easily, but it is still possible to troubleshoot this mistake. First, use your Phillips screw driver to turn the fastener until it feels looser. Next, use your pliers to pull the fastener gently from the hole.
Mistake #4: The pre-drilled holes don’t line up with the screws.
The Problem: You’re about the start the next step in your IKEA assembly project, and you realize that the holes aren’t in the right places to attach the next board’s dowels/screws. Eeeek. I’m not gonna lie, this one’s a bummer!
This usually means one of two things. One: you are trying to attach the wrong piece. Or, two: somewhere, somehow, you’ve messed something up with the hardware. At first, you’ll want to blame (curse?) IKEA, thinking they pre-drilled the holes in the wrong place. But, I can pretty much assure that they haven’t. I mean, I’m sure it has happened, but it’s not very common. Plus, it’s easy to make silly assembly mistakes.
The Fix: To troubleshoot, make sure you have the right piece. If you’re sure you do, next, go back through the last few steps of the IKEA instruction manual to see where you’ve gone off course. You might need to undo some of your assembly work up to that point.
Mistake #5: Your furniture piece has gaps.
The Problem: Sometimes as you put your IKEA furniture together, you’ll discover narrow gaps between your boards. In other words, the boards aren’t as tight as they should be. To avoid this, I usually tap all my boards together lightly with a rubber mallet before using my screwdriver to turn the cam lock fasteners.
The Fix: If your finished piece feels shaky or ricketey, this usually an easy fix too. Typically, it means that something hasn’t been tightened well enough, usually a cam lock fastener or two. Check around the area of a gap for cam lock fasteners, and then use your Phillips screwdriver to tighten them up.
Tools for Assembly (That Might Not Be Obvious)
Wondering what tools you need for assembly of IKEA furniture? In addition to the tools supplied by IKEA, which typically include an allen key and small wrench, here’s a few others that I always find helpful to have on hand:
Phillips Screwdriver
Rubber Mallet
Hammer
Needle nose pliers
Scissors
Level
Woot, Now You’re an IKEA Furniture Assembly Ninja!
Yay you! Pat yourself on the back. If you’ve read this far, you now know ALL my best troubleshooting tips for assembly IKEA furniture. You’ve earned my respect, and the title of IKEA Assembly Ninja. Now, go forth and assemble. Best of luck with whatever project you’re about to work on!
Lost Your IKEA Instructions?
You can find IKEA instruction manuals online here.
Decided You’d Rather Not Assemble?
You can find IKEA assembly help here.
Until next time, friends.
K.