

This post was most recently updated on September 23rd, 2019
Yesterday’s post on my Love Conquers All Painted Canvas was about creating artwork yourself. I’ve always been a big fan of creating diy art, even though I’m not an artist. Yes, I also have pieces from ‘real artists’ and other pieces I’ve purchased along the way. But doing it yourself is a great way to fill wall space or change things up inexpensively, perhaps while you’re saving for the Mona Lisa ;-).
Especially this time of year, when all the Christmas stuff gets packed away, I always crave change in my home, and artwork is the perfect way to make a room feel new again. The only problem is that it can be expensive, and really, who has a bunch of extra moula after the holidays to spend on your home? Luckily, its pretty easy to jazz up your walls inexpensively. With some imagination, you can pretty much make anything into awesome diy art.
Just take a look at these ten diy wall art ideas that I’ve created for my home. (And if I can do it, you can too!)


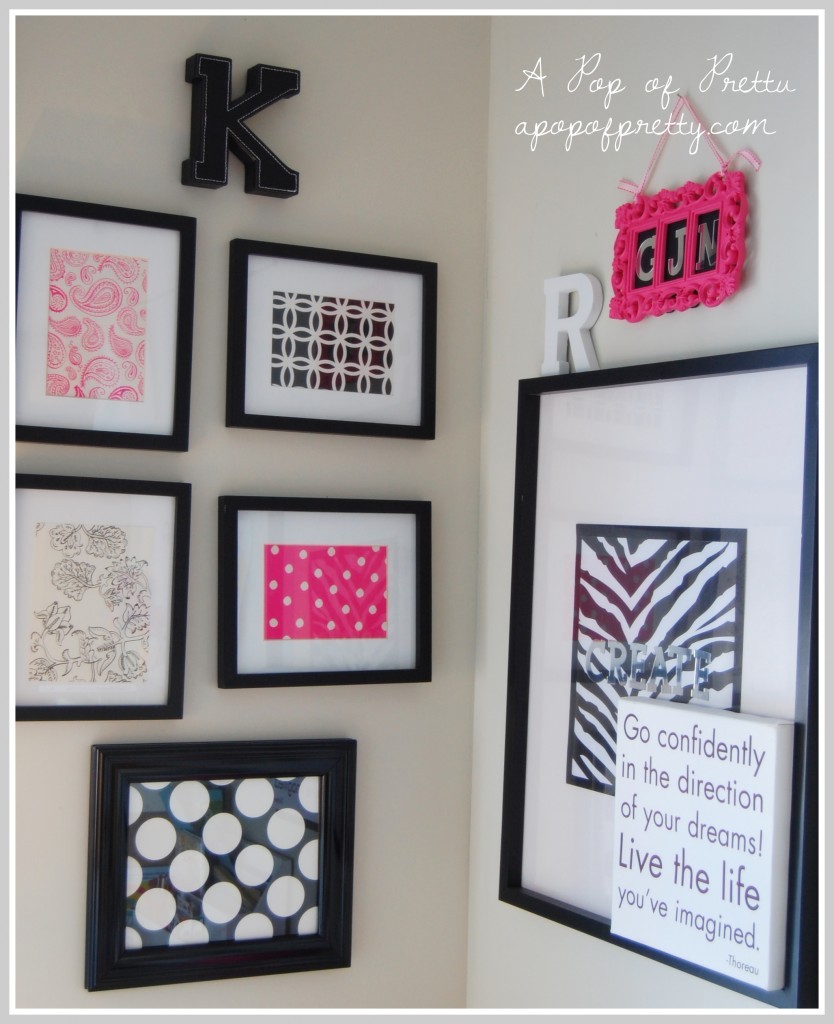
1. Create art with scrapbook paper.
Like I did here, for example, in my craft room. (See more of my craft room here).


I also used scrapbook paper here, for this large piece in my twin boys’ nursery.
(Click here to check out how this DIY nursery art).


2. Embellish a frame with letters.
In this piece, I added the initials of my 3 little sweetie-pies.


And, here, I added the word “create” to this piece with mirrored adhesive letters.


3. Create a ‘vintage sign.
Get out your stencils and sand paper!
You can check out my tutorial for my distressed bakery sign here.


4. Hang something meaningful and unexpected.
Anything can be wall art! My daughter’s first ballet costume from when she was 3 (boo hoo) hangs in her bedroom, and was the inspiration for the room’s palette of lime and pink.


5. Paint a family monogram on burlap.
You can find my tutorial for my painted monogram art here.
And, you can see this piece in its place in #6 below!


6. Group art you already own into a ‘gallery’.
When I created this wall gallery, I already owned all of these pieces, and some were gathering dust. But once they were grouped together on the same wall, it gave them new life! You can see my living room makeover here.


7. Have fun with Mod Podge!
Can I just say, Mod Podge rules. The possibilities are endless!
Take, for example, this gallery wall in my daughter’s room, which was made with with book cover-wraps, a printer and Mod Podge. Check out how I made it here.


I also used Mod Podge to create these Pottery Barn Kids knock-off plaques for my kids’ Playroom.
You can see how I made them here.


8. Buy from an artist on Etsy.
I’m head over heels for Etsy (etsy.com). You can find the most gorgeous stuff on there.
I purchased these 3 pretty prints from Studio Mela on Etsy for under $40, and then I framed them myself for our newly renovated basement.


9. Frame a FREE ‘printable’.
If you follow other decor or crafting blogs like mine, then you are probably already aware that you get awesome printables on the web for free. If you weren’t aware, well, now you know! Just search Google for ‘free printable art’ and you’ll be amazed at what you’ll find!


10. Paint a canvas with an inspirational quote.
Finally, you can create a piece like this one EASILY with a stencil.
Just check out yesterday’s post on my “Love Conquers All” painted canvas for a step-by-step tutorial.


As you can see, I’m almost out of wall space, lol!
(Darn you, open concept!)
But I’ve still got a couple of other DIY wall art projects in the works which I’ll show you in the coming weeks.
One involves these letters I showed you before Christmas.


Another involves a map.
And, finally, I’ll be jazzing up another wall in my craft room soon.
Now, get to it! Go forth and create!
~Kerri
P.S. I’m linking up with Beth at…

