This post was most recently updated on January 18th, 2022
In this article: Have you ever wondered how to paint abstract art? Well, DIY abstract art is easier than you might think! Today, I’m sharing a beginner tutorial on how to paint your own abstract art canvas. I’ll review the four (4) beginner level abstract painting techniques that I used to create the coastal inspired abstract art painting that’s displayed on my fireplace mantel! Check out this easy, beginner tutorial if you want to create a diy abstract art masterpiece!
Wondering how to paint diy abstract art that you can hang in your home with pride? In this beginner tutorial, I’ll show you how I painted my own diy abstract art canvas I loved enough to display prominently in our home. If you follow me on Instagram, you might have spotted the coastal inspired piece I recently created. It reminds me of a lake and sky with morning mist.

Learn How to Paint Abstract Art in a Few Easy Steps!
You think you can’t learn how to paint diy abstract art? I’m here to assure you that, um, YES YOU CAN. And, why do I have so much confidence in you? Because, if I can do it, you can too! You see, I am an amateur painter too. I’ve played with how to paint abstract art for a few years. But, I have no formal training. Yet, I’ve managed to create some lovely DIY abstract art pieces, including the piece I’m featuring in this beginner tutorial. That’s the thing about abstract art, right?. Luckily, it doesn’t have to resemble anything specific, so it’s much easier to paint as a beginner!

Support Professional Artists Too!
Before I start this DIY abstract art beginner tutorial, I need to put this into the universe: Learning how to paint abstract art yourself is fun but isn’t a substitute for a professional artist’s work. So, if you have the budget, please support your favourite local artists. Professional artists put their heart and soul into their work. And, the world would be a much blander place without it! Learning how to paint abstract art is a great way to fill empty wall space with something pretty. But, you should aim for a great mix of high/low art from different sources.
Here’s How This DIY Abstract Art Tutorial is Organized
I know you’re itching to start your DIY abstract art masterpiece! But, before I show you exactly how to paint abstract art as a beginner, let’s pull out the road map for this tutorial! That’s because it’s always easier to follow along when you know where we are headed, right? Well, to keep you on track, this article has 4 key sections, which you can skip to simply by clicking on any of the list items below. Here’s how it’s organized:
- Beginner Tips: Before You Begin
- DIY Abstract Art Supplies: What You’ll Need
- How to Paint DIY Abstract Art: Four (4) Beginner Level Abstract Painting Techniques
- #1: Wet on Wet Broad Brush Strokes
- #2: Vertical Pouring
- #3: Wet Blending with Water
- #4: Dry Brushing
- How to Paint DIY Abstract Art: Step-by-Step Tutorial
- The seven (7) easy steps to creating your diy abstract painting using the four abstract painting techniques above.
Beginner Tutorial Tips: Before You Begin
Before you start this beginner level DIY abstract art tutorial, I want to share some advice to get you in the right headspace! These are just a few tips that helped me create my own abstract art canvas without getting overwhelmed or being too hard on myself.
Streamline your colour palette
Keep it simple! As a beginner, I found it easiest to work with a very streamlined colour scheme. I restricted my colours to blues and whites, and used just 3-5 hues. And, if you use a paint palette, you can mix those few to create additional shades. So, before you begin your DIY abstract art piece, decide on a few paint colours and stick to them.
Don’t start with expectations
Don’t be hard on yourself, friend! Learning how to paint abstract art can be frustrating when things don’t turn out as you imagined. But, the fun of painting a DIY abstract art canvas is the adventure! It’s ok to start with a general idea of the kind of look you’re aiming for. (For example, in my case, I knew I wanted my art canvas to resemble the water, like the ocean or a lake.) But, don’t be uptight about it. I find I usually ‘discover’ the abstract design as I work on it. When I step back from my canvas, I begin to ‘see’ something forming that feels familiar, whether it’s tangible (a landscape) or intangible (an emotion). And, then I go from there.
Trial & error is everything
Experiment with lots of techniques! Trial and error is how you learn to paint abstract art! Unless you are aiming for a serene, quiet abstract art canvas (which can also be gorgeous), my advice is to try lots of abstract painting techniques as you go. (I’ll discuss 4 beginner level ones below.) Creating movement through varied techniques is what creates the visual interest in most abstract paintings. If you try something and decide you don’t love it, just paint over it using another technique. Abstract painting is very forgiving. Truly, you can never ‘ruin’ your abstract art.
Abstract art is subjective
Above all, remember that the beauty in abstract art is subjective. What you ‘see’ in it, might be entirely different than somebody else’s interpretation. If your DIY abstract art pieces speaks to you, that’s all that matters. Beauty is in the eye of the beholder.

DIY Abstract Art Supplies: What You’ll Need

Before you begin your abstract art canvas, you’ll need to gather up some supplies. (Note: The following suggestion list contains affiliate links.)

Large art canvas.
You can buy an art canvas at any craft supplies store. Or, even better, simply paint over an older store-bought art canvas that you no longer love. (This is what I did.)
Water-based Paints.
Choose 3-5 water-based paints in your chosen colour scheme. Any acrylic craft paint, chalk paint and/or latex wall paints will do. You can use whatever you have on hand. (It’s critical that you use water-based paints – not oil – so that you’ll be able to work with them using the techniques I’m covering here.)
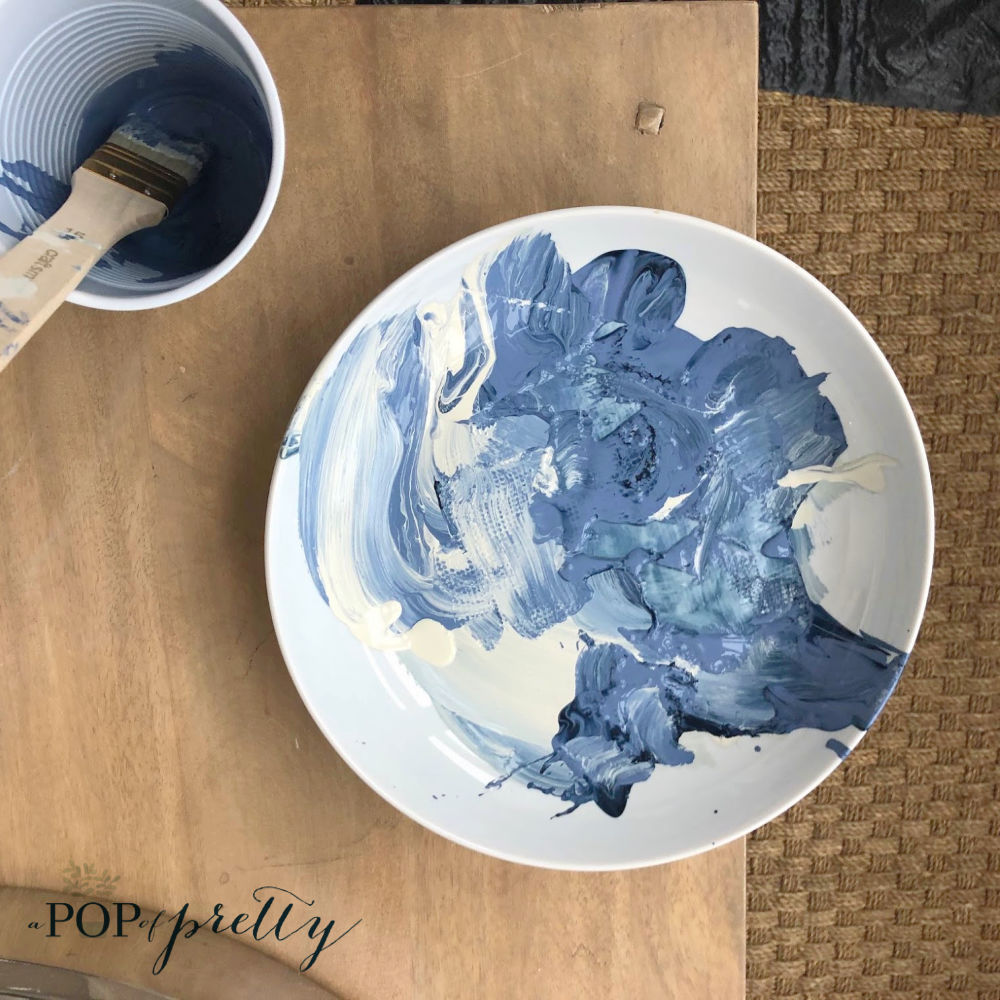
A palette (or alternative).
You don’t need a fancy artist’s palette to learn how to paint abstract art. But, by all means, if you have one, use it. A plastic tray or ceramic plate works well too. (I used a wide ceramic bowl!) You just need something large enough for a dollop of each paint, and room to overlap and mix them.
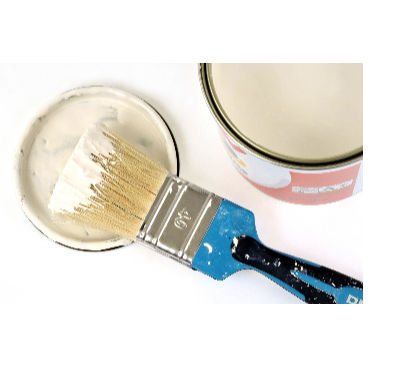
Paint brushes.
You should have a variety of sizes on hand, for example, trim paint brushes (2.5-inch and 1.5-inch) are great for painting broad strokes, while smaller art brushes are better for adding in detail. Varying your brush size will help create different abstract paint effects.
Foam brushes and sponges.
Foam brushes and/or sponges will be needed for wet blending your paints. (I’ll discuss below.)
Cup of water (+ Spray Bottle optional).
You’ll need a cup of water on hand for cleaning brushes and also for wet blending. A spray bottle can also come in handy but isn’t critical. (I’ll discuss later.)
Texture Medium & Spatula (Optional).
If your canvas is brand new and/or smooth, you might want to add some texture to it before you begin to paint. (I’ll cover this below.) You can use an art medium designed for this purpose, or, do as I did! I used a tube of latex caulking paste. Drywall spackling mixture would work too. Any small plastic or wood spatula can be used to apply it.
Top Coat/Varnish.
To protect your abstract art canvas from fading, and to give it a polished look, you’ll need to give it a clear top coat once it is completely dry. You can find this at any craft supplies store.
Drop cloth or garbage bags.
Learning how to paint abstract art is messy. Be sure to protect your floors with a drop cloth or garbage bags.
Paper towels and/or rags.
Have paper towels or rags handy for cleaning up the paint that misses your drop cloth, haha.
How to Paint Abstract Art:
Four Beginner Level Abstract Painting Techniques
In this section: I’ll explain the four (4) beginner level abstract painting techniques I used to paint the abstract art canvas featured in this tutorial. In the next section, I will then pull all four techniques together in an easy, step-by-step tutorial on how to paint abstract art like mine.
There are lots of techniques for painting your own abstract art. But, to keep things simple, today I’ll share just the four (4) beginner level techniques I used to paint the abstract art canvas featured in this tutorial. I’ll explain each technique in this section. Then, in the next section, I’ll outline the exact step-by-step instructions for painting your own abstract art canvas. This will include the order in which I used each of the four abstract painting techniques. But, for now, let’s go through the them!

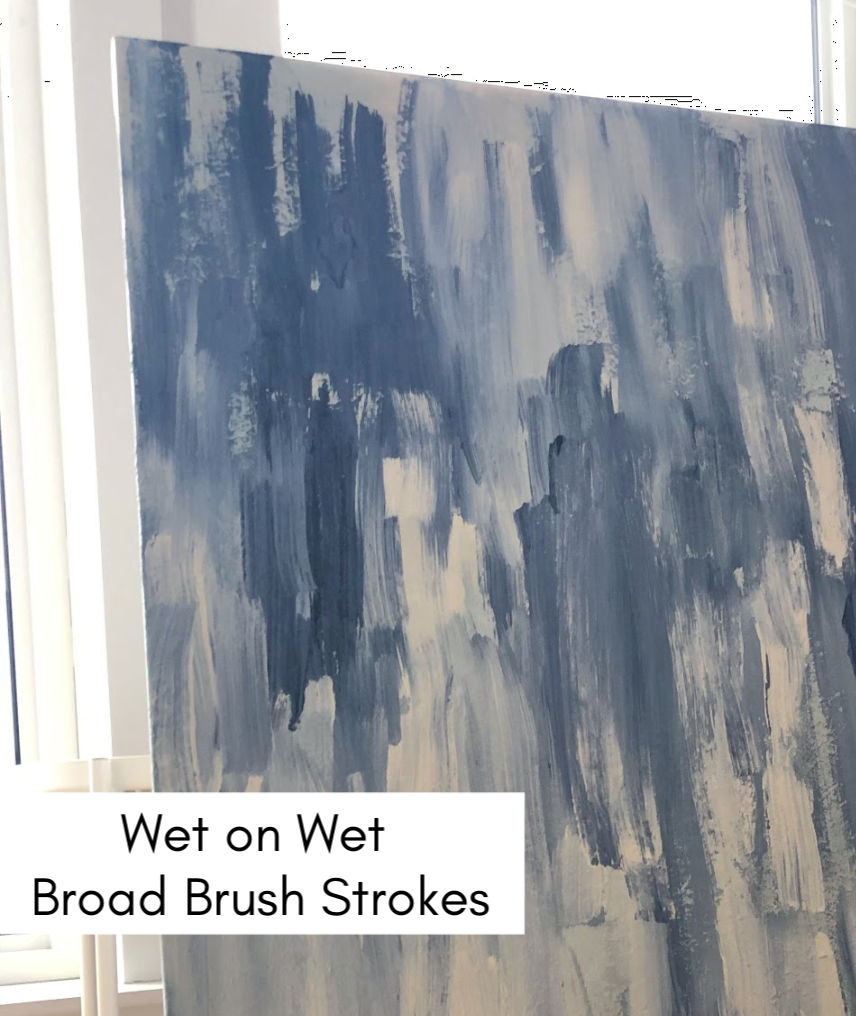
#1: Wet on Wet Broad Brush Strokes
How to Paint Wet on Wet, Broad Brush Strokes
Painting diy abstract art using wet on wet broad brush strokes provides the foundation (or background, if you will) for your entire piece. It is the first technique you will use in this tutorial. And, yay, it is super easy. Just paint brush strokes across your canvas while your paint is wet, using different sized trim paint brushes, in a very loose, unstructured way. Allow your colours to overlap and intersect, varying the brush size as you go.

With this technique, the key is to paint your whole canvas in in brush strokes while your paint colours are still wet. This allows the colours to interact and mix together as you you go. You’ll notice that, in my diy abstract art, I painted broad strokes across my canvas very randomly. The colours overlapped and intersected in an unstructured way. I did this until the entire abstract art canvas was covered.

What to Use: Wide Trim Paint Brushes
You’ll need to use trim paint brushes in this technique. (You know, the ones you’d use when painting wall trim, like a 2.5″ and a 1.5″.) I recommend varying between medium and wide trim paint brushes so that your brush strokes will be different widths, creating more visual interest. You can use a different brush for each colour, but it’s not at all necessary. Just one of each size works fine. In fact, using the same brush in several colours will create a softer transition between each hue.
What it Does: Creates the Overall Mood
Painting wet on wet, broad, random brush strokes across your entire canvas will create the overall mood of your piece. It’s basically the foundation or background for the rest of the work you’ll do. An abstract art canvas with lots of dark, busy areas will feel deep and moody. By contrast, an abstract piece with mostly light paint, and only a few busy focal points, will feel light and airy.
The key is to strike a nice balance of loud and quiet in your diy abstract canvas. I found that the deeper the colours I used, and, the more brush strokes I made, the more of a focal point that particular area of my canvas became.
But, you don’t want your entire canvas to feel busy. Instead, you’ll want those areas to be key focal points which draw the eye. To achieve this, you’ll need to balance out the busy parts of your canvas with quiet areas too. To keep some areas of your abstract canvas more serene, use your lightest paint colours, and make fewer and wider brush strokes.
In my finished art canvas above, you’ll notice that the top portion feels more serene than the bottom. That’s because when I started my piece with this technique. I aimed for lots of visual punch in some places, and left this upper area much quieter. The busy parts ended up feeling like waves/water, while the quiet ones felt like sky.
Note: This photo is of the finished piece. I used other techniques besides this one to get it to this point. However, this first technique provided the overall mood and foundation for the rest of the project. (Don’t worry, I’m going to discuss all of the other techniques below!)
Once you’ve completed this technique, your entire abstract art canvas will look something like this:

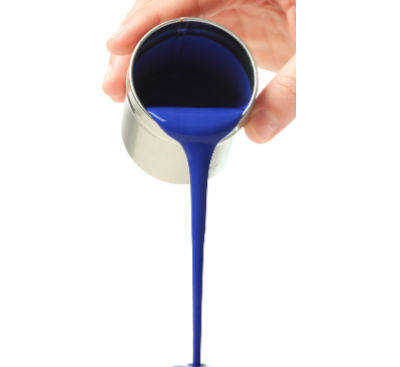
#2: The Vertical Pour
How to Do a Vertical Pour
This second abstract painting technique is messy, but definitely the most fun. The vertical pour is exactly as it sounds: pouring paint down your abstract art canvas and watching it drip and flow!

It’s so easy to do. Just make sure you have a good floor covering under your abstract painting. Take a small container of paint and pour it on to your canvas, from from the top. The paint will make its way down your canvas on its own. Try not to interfere with its path by mucking around with the paint drip with brushes. Just let the paint drip and flow until it reaches the bottom of your canvas. The thicker your paint, the more slowly it will flow.
What to Use: Paint & Patience!
This abstract painting technique is super easy. In fact, it requires almost nothing from you at all, except a willingness to let the paint take control. Once you pour the paint vertically down your canvas, it’s entirely up to the paint what happens next! Step back and watch the magic happen. The paint will drip ever so slowly down the canvas, taking on its own personality. You can even do several pours close together to allow the paint drips to intermingle on their way down the canvas.
What it Does: Creates Definition & Texture
Vertical pours help to create more definition and texture on your canvas than you are able to achieve simply by painting random broad strokes. And, by using deep colours, these drips will help to amp up the busy focal points on your canvas. Overall, doing a few vertical pours close together will create visual interest and movement in your diy abstract art!
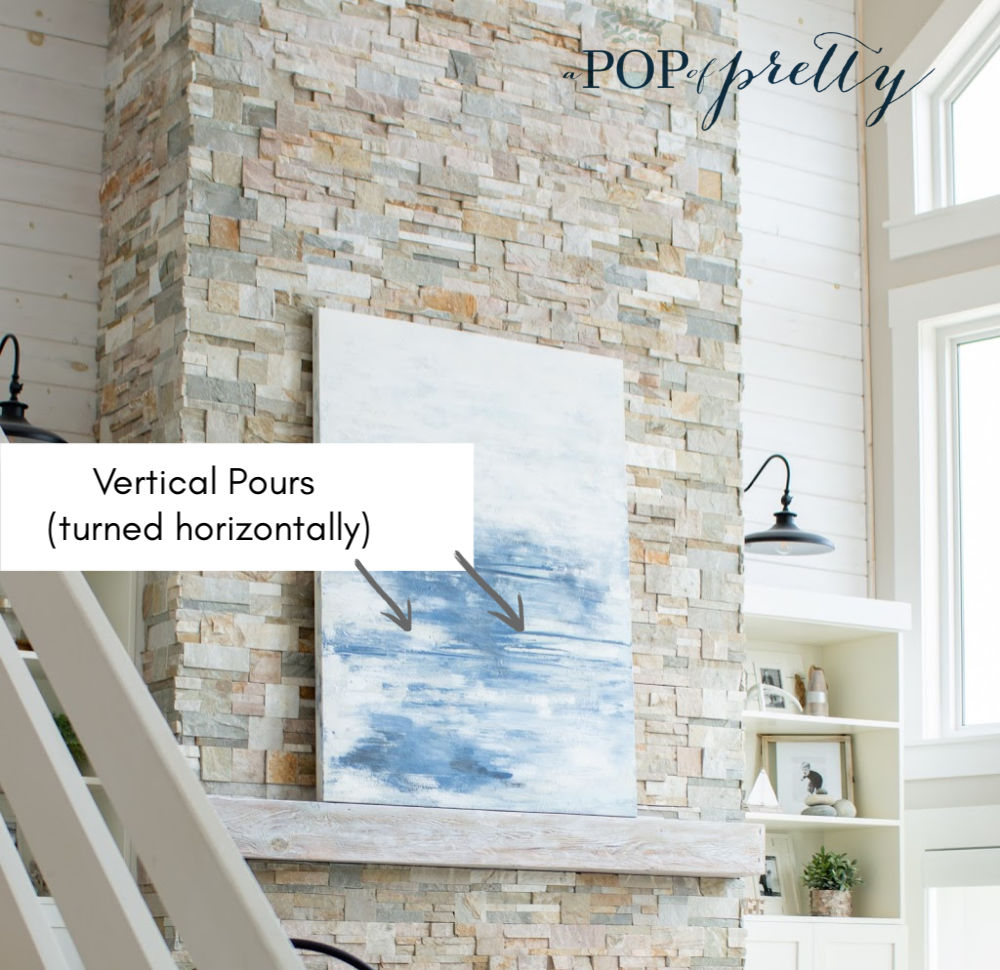
You’ll notice that in my abstract painting, there is an illusion of a horizon with thin lines going across the centre of my canvas. I achieved this by doing vertical pouring while my canvas was in a landscape position. Then, I turned it into a portrait position for the remainder of my abstract painting process. Vertical pouring can easily create horizontal definition if you turn your canvas!
#3: Wet Blending (with Water)
How to Wet Blend with Water
The third abstract painting technique is exactly as it sounds: blending paints together with water on your canvas.
To ‘wet blend’ colours on your diy abstract art canvas, you should have a container of shallow water handy. Wet your paint brush ever so slightly, and then pull it through several paint colours to create a soft transition between the colours. Typically, I would use this technique while my paint has dried a little, but not completely.
As an alternative, you can also use a spray bottle, and lightly spray areas of your abstract canvas, wherever you want a smoother transition between colours. You can then use a foam brush to blend the colours in that area of your diy abstract canvas.
What to Use: Water!
The ‘Wet on Wet Broad Strokes’ painting technique (#1 above) it is essentially a form of wet blending because the paint is wet. However, this Wet Blending technique uses water to create even smoother and softer transitions between your colours. And, unlike the first technique, it can be used when the paint has dried a little (as long as you’ve used water-based paint as recommended!)

What it Does: Softens Transitions Between Colours
This technique will help to remove hard edges and transitions between your broad paint strokes. Each colour will begin to look as of it simply bleeds into the next. Before beginning to wet blend with water, step back from your canvas and decide which (if any) areas of your abstract painting feel too harsh for the look you you want. I find this technique to be most effective for blending lighter colours into one another, almost creating an ethereal effect.

Wet blending with water is a great way to make some areas of your abstract art canvas feel quieter, which will help give more attention to the focal points you created with the first two techniques.
For example, in my painting above, you can see that the top part of the canvas is very quiet, almost like a sky, whereas the bottom part draws the eye because of the deep colours. I used lighter paint colours on the top portion, and then used wet blending to make the sky feel soft and ethereal.
#4: Dry Brushing
How to Dry Brush
This final abstract art technique is the one always I use at the end of my diy abstract painting process to create a bit more fine detail. I first learned how to dry brush on furniture. Perhaps you have too. If not, no worries. It’s really simple to do. Just add a little paint to the tip of a dry paint brush, and apply it in very light strokes, quickly across your dried canvas. If you’d like to see this technique in action, there’s a quick demonstration here:
What to Use: Dry Paint is Key
With this technique, you need to wait until your painting is completely dry. You will also use a completely dry paint brush. The only wet part will be the paint you add to the tip of your brush.
What it Does: Adds Finer Details
Unlike when your canvas still had wet paint, the paint colour on your dry brush won’t blend seamlessly with the others. Instead, the brush will just skid across the dry paint, depositing flecks of the colour in an abstract way. And, if you have added texture to your canvas (I’ll discuss below), the effect will be even more pronounced on the raised areas of your canvas. This is a great way to add some finer detail to your art canvas and/or amp up the busier focal points.
How to Paint Abstract Art DIY: Step-by-Step Tutorial
In this section: Yay! Now, you’ve learned all four beginner level abstract art painting techniques I used on my abstract art canvas. That means you are ready to move on to the step-by-step tutorial! In this section, you’ll learn how to pull all four techniques together to create your masterpiece. I’ll share: how to prep your art canvas, what order to use the above techniques, and how to protect your finished piece.

Step 1: The Prep Work
Before you begin to paint, there’s some prep work you might wish to do with your canvas.
Add Texture to Your Abstract Art Canvas (Optional)
Whether you are starting with a new art canvas, or painting over an old one, you may want to add some texture to it before you paint it. Adding texture to an abstract art canvas before you paint it gives it more dimension, and makes the paint look more authentically ‘arteeeest’! Acrylic craft and latex wall paint typically dries with a flat appearance, so adding texture before you paint just helps with creating more depth.
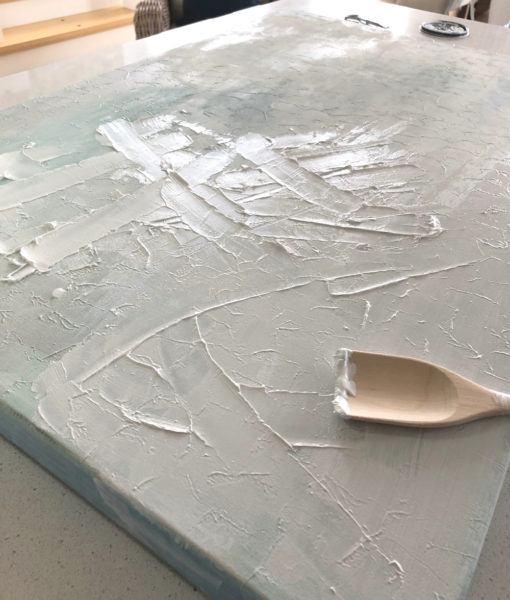
To add texture, you can use an art medium created for that purpose. Or, you can simply use a tube of latex caulk or drywall spackling that you already have on hand. Squeeze it onto your canvas, then use a small spatula to spread it around. Create dimension by dragging and swirling the spatula. (See my below video.) Don’t overwork it. Once you are happy with it, let your texture medium dry, according to the directions. It usually takes a few hours. Trick: You can even use a hairdryer to speed it up!
Paint Your Canvas a Neutral Colour (Optional)
Once I’ve added some texture and allowed it to harden, I usually give the entire surface of the canvas a coat of neutral paint, usually white. I typically do this even if it is a brand new, unfinished canvas.
I just find that a layer of paint makes the surface smoother, and it is easier to build the layers of my abstract piece. And, if you are painting over an old store-bought painting that already has a design on it, giving the canvas a coat of neutral paint will give you a nice, blank canvas to work from.
(You may choose to skip this step if you like the colours in an old canvas you are painting over, and you simply want to build on those.)
Decide on Canvas Orientation
Before beginning to paint, you should decide on the orientation of your canvas. In other words, do you want it to hang vertically or horizontally? Perhaps there is a particular wall you have in mind to hang your diy abstract canvas. If so, it’s best to give this some thought beforehand.
That said, if it the orientation of the canvas doesn’t matter to you, sometimes that gives you more flexibility creatively. For example, in my case, my abstract art canvas started out in a horizontal/landscape orientation. But, when I turned it vertically (portrait), I liked it a whole lot better. That’s because the lines I’d created from the vertical pours (see above for technique) made more sense when turned horizontally as they looked like the horizon.
Find the Perfect Spot to Paint
Now that your art canvas has some great texture and a light coat of neutral paint, you are ready to get started with the good stuff. But first, you need to find the perfect spot to paint.
It is always best to paint your abstract art canvas while it is standing vertically (as you’d hang it on a wall), not horizontally /flat. If you don’t have an art stand (most of us don’t lol), it’s perfectly ok to stand it up on the floor against a chair. Just be sure to place your drop cloths underneath it because things can get super messy.
Also, make sure that you have at least 6 feet of physical space behind you. This is so that you can step back from your abstract painting from time to time to get some perspective.
Step 2: Paint ‘Wet on Wet’ Broad Strokes
Now that you’ve placed your prepped canvas in the perfect spot, you are ready to begin to truly learn how to paint abstract art! You will start by painting broad strokes across your canvas, as described in Technique #1, above.
As discussed earlier, this technique lays the foundation for the rest of your piece. It will create the background for your ‘finer detail work’. The first step will help decide the general mood for your abstract art painting, whether deep and moody, or light and airy. Before you begin, you should have a loose plan for the areas that will be the focal points, and the areas that will serve more as white space.
Once you’ve completely covered your canvas in paint using random, unstructured broad brush strokes, step back from it and assess. Decide if you are happy with how it is looking. Do you like how the colours are distributed? Does it have a nice balance of loud and quiet, busy and serene, hard and soft? Is it beginning to resemble something familiar? Or, is it perfectly abstract? (Which is entirely ok too!)
You can edit it by adding more paint in some areas, or quieting other areas with lighter paint. Or, you can turn it on its side to see if it speaks to you better when it’s in another orientation. Once you are pleased, move on to the next step.
Step 3: Wet Blend (with Water)
In this next step, you will use the Wet Blending (with Water) beginner technique for how to paint abstract art. Review Technique #3 above for details. This technique is great for softly blending the lighter areas of your canvas. But, if you already like the way it looks, feel free to skip over this step entirely.
Once I had covered my entire canvas in broad, random bush strokes, and edited it to my liking, I then used the some wet blending with water to soften areas of my diy abstract art canvas. For example, you’ll notice that in my painting, I wanted the top half to feel like a cloudy sky over water. So, to achieve a softer sky, I used a wet foam brush to blend the colours in this area together more gently and seamlessly. This made the ‘sky’ portion feel more airy and ethereal.
Make sure you add water gradually! I definitely recommend that you start by using just a little water on your foam brush. Then, if you like the effect, add more water to it as you go. It is always easy to add more, but harder to fix it if you add to much.

Step 4: Vertical Pouring
Now, you are ready to add some vertical pours to your canvas! This part is so fun, But, it’s also messy, so be sure you have lots of floor coverage. Refer back to the video in Technique #2 above for instructions.
You can do as many or as few vertical pours as you want! Use one colour, or several, depending on your preference. Pour them close together (so that they intersect) or far apart. The sky’s the limit.
The trick here is patience. The thicker your paint is, the more time it will take to make its way down the canvas. Resist the urge to muck around with it. The natural path of each drip will create a completely abstract effect. Go make yourself a cup of tea or a glass of wine, turn on you favourite show, and wait for the drips to finish their work. It may take awhile for these drips to dry, depending on the thickness of your paint.
Step 5: Assess & Edit
Once your pours have dried, step back from your diy abstract art canvas at least 6-8 feet. How is it looking? Is it a masterpiece yet? Does it speak to you? Is it whispering, “You, my friend are an ARTIST!” Or, is it nudging you to keep editing? Perhaps there are some areas you love, and some areas that aren’t quite speaking to you. If so, keep working!
Mix and match: Now is the time to do some further editing using any and all of the above techniques. By now, you probably have gained new confidence in how to paint abstract art! As well, perhaps your diy abstract art piece is resembling something familiar, but isn’t quite there yet. Well, now is the time to use AAALLLL of the skills you’ve acquired in this tutorial to edit your piece further.
For example, you can paint more random brush strokes in areas that you’d like to lighten or darken. You can bring out the focal points even further by adding deeper colours in those areas. You can ‘quiet down’ other areas by using lighter paint colours or water on a foam brush to wet blend the hues. Or, you can even add some more vertical pours to create more visual interest. The sky’s the limit!
Furthermore, you can even try some techniques that aren’t discussed in this tutorial if you are feeling particularly confident! Once you are happy with your piece, move on to the final step in this tutorial.

Step 6: Add Finer Details
Um, hello there, abstract artist, you! You have reached the final step in my beginner tutorial on how to paint abstract art! Woohoo! Once your diy abstract painting is completely dry, you are ready to add some finer detail to your canvas. Up to this point, most of the work has been in large brush strokes and blending. But, adding some finer detail to your canvas makes it come alive and creates some extra magic.
Dry Brushing
There are lots of methods for adding finer detail to an abstract art canvas – such as stippling, splattering and more. And, there are even special art brushes you can buy for this. (Feel free to Google these.) However, I find the easiest is to simply use the dry brush technique. Refer back to Technique 4 above for details, or google a video on how to dry brush.
Using the dry brush technique on your canvas will allow you to deposit tiny hits of colour in areas where you want to amp up the detail. For example, in the areas of your canvas that are focal points, you may want to play them up even further. This extra layer of detail will help create a finished look for your diy abstract art piece.
Play around with this technique! Practice on the lighter areas of your canvas with a lightly-hued paint. Then, when you have more confidence, add some hits of dark on light, or light on dark.

Step 7: Protect Your Abstract Art Canvas
Now, my friend, you are finished the painting part! You have learned how to paint abstract art in a few easy steps! Do you feel accomplished, lol? But, wait! Before you go do your happy dance, there’s one final thing you should do! Once your abstract art canvas is complete and dry, you should definitely add a protectant finish. A finishing varnish will add some extra polish to your piece and will help prevent fading over time. (Note: Following suggestion list contains affiliate links.)
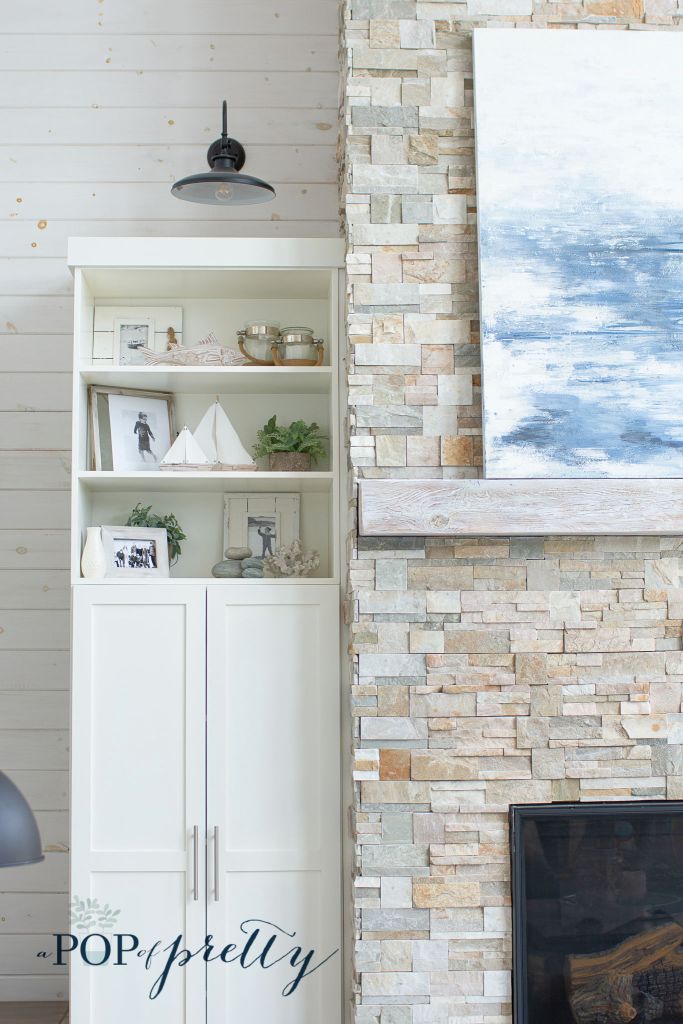
Now, all that’s left to do is to hang your diy abstract art canvas in your home! I displayed mine on my fireplace mantel.

More Abstract Art You Might Love
Whether you learned to paint abstract art on your own in this tutorial or not, it’s always fun to buy new abstract art pieces for your home. Here are a few abstract art pieces that I love. They all have a casual coastal vibe, similar to the diy abstract art piece over my mantel. (Note: Following suggestion list contains affiliate links.)
Share the Love
If you liked this tutorial and think that others might too, I’d love for you to share it with others on Pinterest and elsewhere!


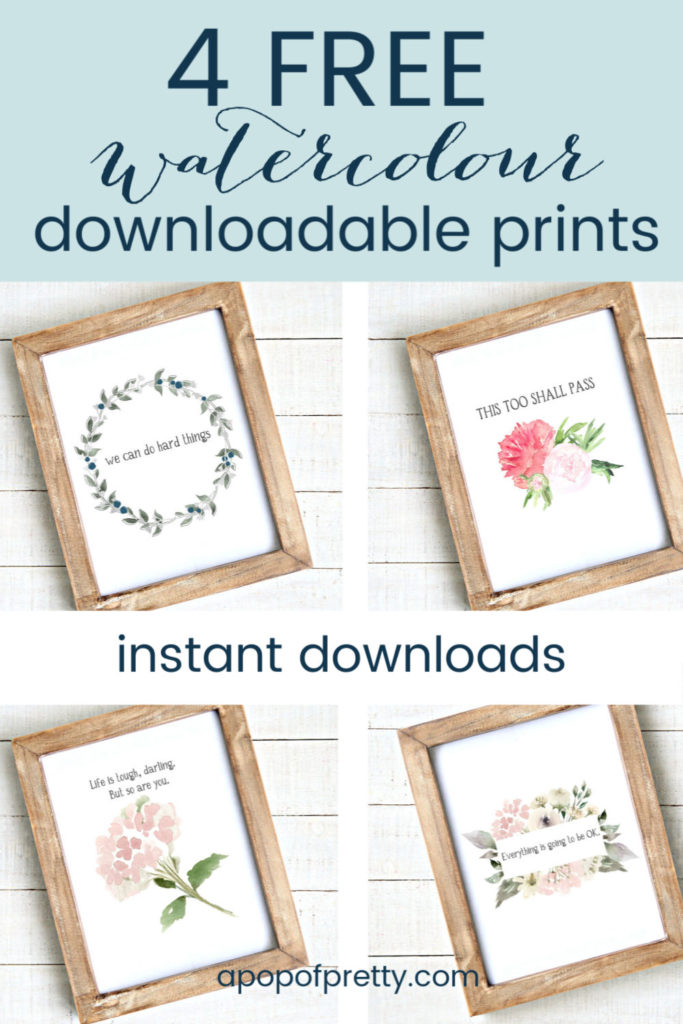
Other Wall Art Ideas: Printables!
Are you looking for other pretty things to add to your empty wall space? I have some free downloadable art on the blog, as well as stylish, affordable printable art in my shop JanieJute. Take a look!
I Love Feedback!
I really hope you enjoyed this beginner tutorial on how to paint abstract art! I’d love to see your work if you follow the tutorial. If you found it helpful, please let me know in the comments! I’d also love your feedback on how to make this beginner tutorial on how to paint abstract art even easier to follow!
Until next time,
K.


Kerri,
Your artwork is truly beautiful. And thanks for providing such detailed instruction. I can’t wait to get started!
Thank you so much! I’d love to hear how it turns out!
This post was so thorough! I LOVE your artwork, and would never have guessed it was a DIY project unless you told me 🙂
Awww, thanks Nicole! That’s very sweet!