This post was most recently updated on March 7th, 2020
In this article: You’ll learn how to make a photo booth – easily and cheaply! Are you searching for a simple way to create a party photo booth without much work or cost? Well, today I’m sharing the DIY photo booth I made for a birthday party. The set up wasn’t elaborate, but it was perfect! And, it works great for any kind of party or celebration. The best part? I did it for under $75. Curious? Read on!
Learn How to Make a Photo Booth for Any Party or Occasion
Wondering how to make a photo booth? Well, it’s no wonder! It seems that having a party photo booth is all the rage these days. But, wow, have you noticed that they cost a lot to rent? Plus, I found that most ‘how to make a photo booth‘ tutorials out there required more money and effort than I was willing to commit. (Like, power tools kind of effort, lol!) So, today, I’m going to show you how to make a photo booth for a party, both easily and cheaply. And, I promise, you won’t have to touch a drill!
This popular “How to Make a Photo Booth Cheaply & Easily” tutorial was originally posted in 2013, but was completely updated in January 2020 to include awesome user testimonials and new technological references!

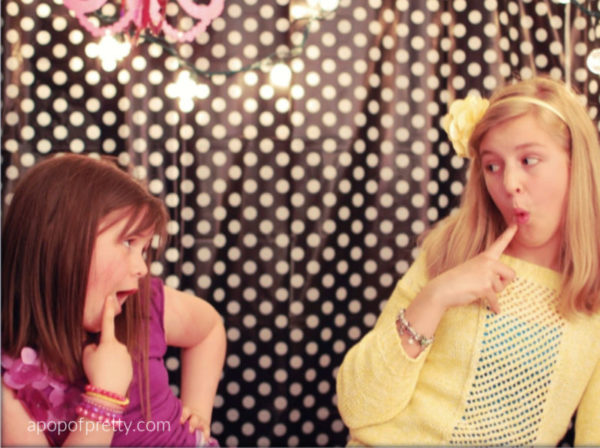
For my daughter’s Broadway Themed Birthday Party, I was determined to make a photo booth without a lot of money or effort. So, after a little research, I came up with a plan that was easy and cheap, and we were thrilled with how it all turned out! Further, you could use this hack to create a party photo booth for any kind of celebration, be it New Year’s Eve, a retirement party, a special anniversary, a Bachelorette Party, a Halloween party, or more. Really, the sky’s the limit!
What Other are Saying About this Photo Booth Tutorial
OMG! Just made one of these for our annual Halloween party last night! Such a hit and so easy to make. Thanks for your prep work and for sharing with everyone. We had a ball!
– Stephanie, Blog Reader
Thank you for sharing your info! I used it for my son’s 16th birthday party this weekend. It was a huge hit!
– Patricia, Blog Reader
Thanks so much for this tutorial! It was really helpful. I’m planning to make a photo booth for a charity ball, and I’m so glad I found an easy tutorial. All the other ones I found had me setting up an umbrella and a flash – WAY too complicated!
– Lydia, Blog Reader
Yahoo! Thanks for this cheap and easy tutorial! I’m making a photo booth for my upcoming ugly sweater Christmas party. I want it to be THE party of the year, this will definitely put me in the ranks!! The other tutorials I read were very complicated and had you making an actual, physical photo booth!
– Emilly, Blog Reader
How Much Will it Cost?
Ok, so I know you are probably wondering: “How much is this diy photo booth REALLY going to cost me? Well, you’ll only have few expenses if you already own a camera and tripod (Option 1), or an iphone and selfie stick (Option 2) , or an instant camera (Option 3) .
In fact, because I already had the equipment I needed, the entire project cost less than $75! But, it’s definitely possible to do it even cheaper if you are economical with your other supplies. And, when you compare this cost to renting a photo booth at about $200/hr, it’s the most affordable option for a party photo booth, by far.

So let’s get this party started! But, before diving into the tutorial, take a look below at how it is organized. That way, you can skip to the parts that are most relevant to you. And, this will really depend on what kind of camera you are planning to use.
How this Tutorial is Organized
There’s a lot to tell you about how to make a photo booth, but I’m going to keep things short and simple. And, to keep us on track, this diy photo booth tutorial is organized as follows:
Part One:
How to Make a Photo Booth: The Materials
The things you’ll need make your own photo booth:
A. Equipment
B. Props
C. Backdrop
D. Decorations
E. Signage
F. Seating
Part Two
How to Make a Photo Booth: The Process
Step 1: Location selection.
Step 2: Photography – camera, lighting, etc.
Step 3: Photo viewing / sharing.
Part One: How to Make a Photo Booth
The Materials
OK, so let’s start with the stuff you’ll need if you want to learn how to make a photo booth like mine. (Please note: This post contains affiliate links for your shopping convenience. For more about affiliate links, check out my Disclosures Policy.)
A. Photo Booth Equipment
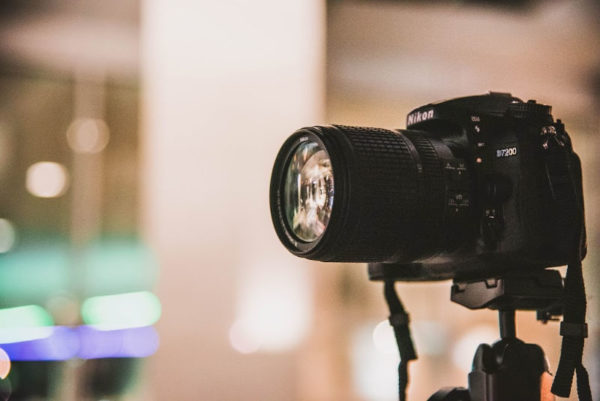
What you need: A DSLR camera, basic tripod, a shutter release remote, and some ambient light sources (strings of fairy lights, a small lamp, etc.) .
DSLR and Tripod Option (for GREAT Photos)
For the best photo quality, I highly recommend using a DSLR camera (if you don’t have one, borrow one!) and a basic tripod. (If you’re interested, this is the tripod that I use, and it’s been great.)
Now, don’t let this next part scare you off. I promise you, it’s so simple and inexpensive: You’ll also need something called a remote shutter release. Basically, it’s a little remote control for your camera. And, I’m going to give you all the details on it in a few minutes.
You’ll need this if the participants will be taking the photos themselves (without a photographer). Obviously, they’ll need a way to click the camera from their seat. And, this simple, inexpensive (and truly magical) little gadget will do the trick.
iPhone and Selfie Stick or Tripod (for Decent Photos)
If you don’t have access to a DSLR and tripod, then you could always use a an iPhone on a bluetooth selfie stick. You’ll still get decent photos, but, since everybody (and their dog lol) takes selfies these days, I’m not sure it would be as novel or as exciting a set up for participants. But, it would certainly still be a fun option. And, you need to work with what you have to keep this project on budget.
Update: Another way to use your iPhone in a party photo booth is to mount it on a tripod for a mobile device. Some of these even come with remote controls! I’ve included one of these devices in my Amazon Storefront. If you are interested, you can find the link in the section, ‘Shop the Post’, below!
If this is the route you are planning to take, the last parts of this tutorial (on photo booth equipment) won’t be as relevant to you. However, you’ll still find the sections about Photo Booth Materials (backdrop, props, etc.) and the Location Selection to be helpful. The final section about Photo Viewing and Sharing Options will also have some great tips for you.
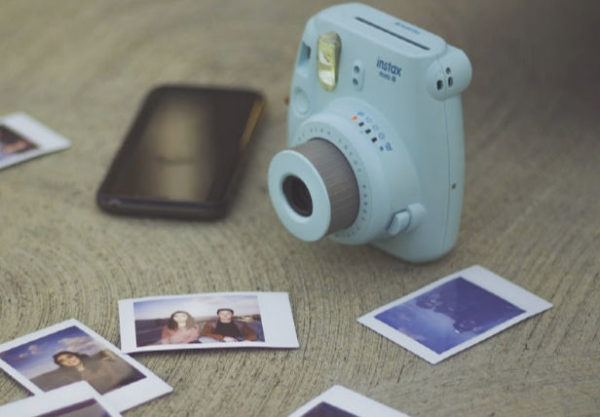
Instant Camera (for OK Photos)
Another option is, of course, an instant camera. There are lots on the market today (Instax, Poloroid, etc.). My kids have one, and, while it’s super fun to use, I’ll admit, the photo quality isn’t that great. But, it would certainly work in a pinch. And, hello, that photo paper isn’t cheap, so you will need to factor that into your project budget. If you plan to go with this option, you should have somebody available to take the photos, other than the party participants.
Also, the last parts of this tutorial (the Photo Booth Equipment and Photo Viewing and Sharing Options) won’t be as relevant to you. However, you’ll still find the sections about Photo Booth Materials (backdrop, props, etc.) and Location Selection to be helpful.
Lighting
Now, here’s the part where I reassure you that you won’t need a fancy professional photographer’s set up. If you have that stuff, by all means, use it. But, let’s face it. Most of us don’t have professional lighting hanging around for some day we might set up a birthday party photo booth, lol.
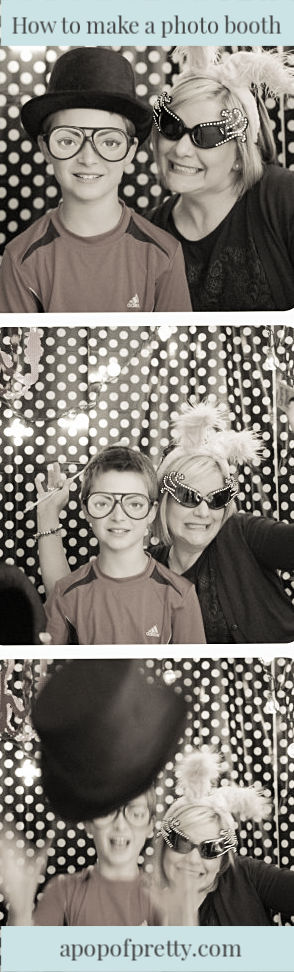
Truly, all you will need, even if shooting in low light conditions, is some ambient lighting, like strings of fairy lights or a few small lamps. How do I know this? Because I set up my own photo booth in the basement with no natural light. I didn’t even use a flash. And guess what? The ambient lighting was enough!
B. Photo Booth Props
What you need: A basket of fun costumes or cardboard props.
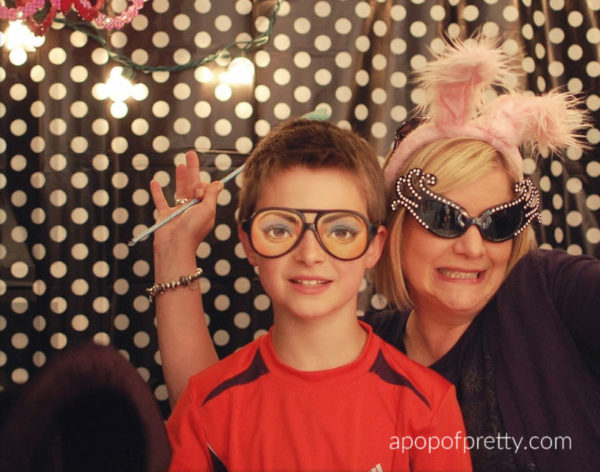
Wondering how to make a photo booth super fun? You will need a basket of awesome photo booth props that party goers can get goofy with! Here’s some items to consider:
- masks
- hats
- moustaches
- feather boas
- bow ties
- speech bubbles
- funny quotes
- mini chalkboards
- costume pieces
- and more!
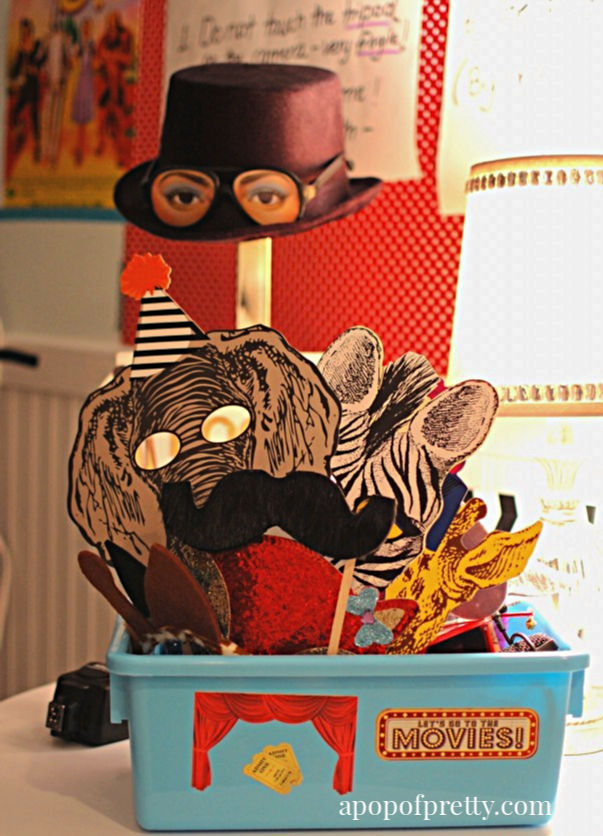
My Picks: Some Fun Photo Booth Props

Depending on your party, you might also want to have a theme for your props. For example, if you child is having a Pirates and Princesses party, add some fun eye patches and tiaras. If it’s for a New Year’s Eve party, throw in some blowers and speech bubbles or chalk boards for writing resolutions. You get the picture!
If you don’t have a stash of costumes hanging around, no need to worry. There are literally a tonne of places to find printable, free diy photo booth props on the Internet. All you have to do is search Google using “free diy photo booth props” or “free photo booth printable props”. Just to get you started, here are few cute ones…
- Summer photo booth props
- Photo booth props for wedding or party
- Eye glasses photo booth props
- Moustaches photo booth props
Once I collected the props, I organized everything on a little table so that you could find a prop you liked without too much searching.
C. Backdrop Material
What you need: Plastic Dollar Store table cloths, painter’s tape.
There are lots of options for how to make a photo booth backdrop, but I was looking for the cheapest one, lol. If I were making this party photo booth for a big event, I probably would have invested in a more expensive option, such as fabric or tri-fold wooden panels.
However, as this was for a child’s party, I simply bought some cute plastic tablecloths from the Dollar Store. (You could also use fabric table cloths you have on hand.) I used 3 large (9ft) plastic table cloths, and they cost a grand total of $6. Gotta love it.
I doubled them over so that you couldn’t see through them, and attached them to the ceiling using painter’s tape to make it easy to take it down without ruining the paint. They worked perfectly fine, however the plastic did cast a bit of glare in the photos, so if you have a bigger budget (say, for a wedding), I’d definitely recommend using fabric table cloths instead.
My Picks: Stylish Plastic Photo Booth Backdrops
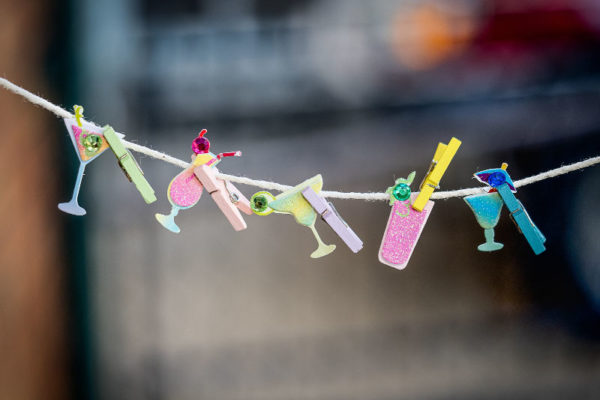
D. Decorations
What you’ll need: Fun decorations for your photo booth space.
Optionally, you might also want to add some decor to make the photo booth space an inspiring spot for fun photos. You can find decorations at party stores based on the theme of your party. For example, because my daughter was having a Broadway party, I strung some lights and added Broadway musical posters to the walls.
My Picks: Fun Photo Booth Decorations
E. ‘The Rules’ Signage
What you’ll need: Poster board for the ‘Photo Booth Rules’
I wanted the photo booth to be fun. But let’s face it, even more importantly, I wanted my camera equipment in one piece after the party! As well, I didn’t want any of the girls at the party to feel left out.
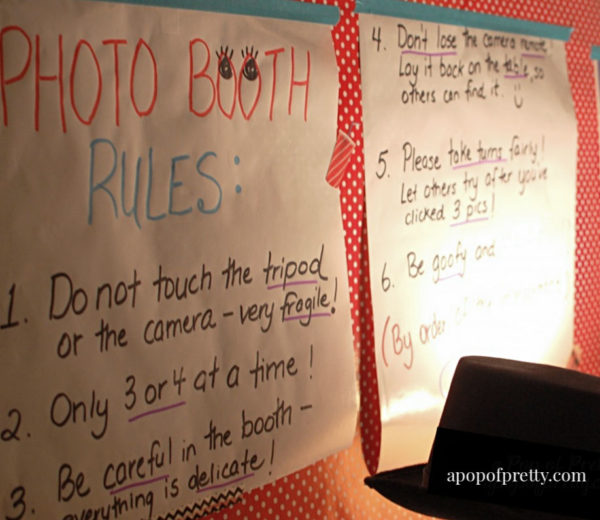
So I put together a few photo booth rules for the ‘rule-follower’-types, and hoped they’d help sheriff the others, lol. I’d highly recommend doing the same thing, even if it’s for adults. (We all know how rowdy adults can get after a glass or wine or two, haha!) You can make a homemade sign on poster board, or use a stylish letter board for some extra cuteness.
My Picks: Fun Letter Boards & Signs
F. Seating
What you’ll need: A long bench or 2-4 chairs.
If you want to know how to make a photo booth that can fit a crowd, you’ll want ample seating! You will need a spot for a few people to sit together (in front of the backdrop) while they take a photo. I used a long bench, but you could just as easily use a few chairs in a row.
Part Two: How to Make a Photo Booth
The Process in Three Easy Steps
.With all your materials in hand, you’re now ready to set up the photo booth for your party. This is where the magic happens!
Step 1: Location Selection
What to do: Choose a location in your home or party venue for your diy photo booth that has great natural lighting.
OK, so now that you have everything you need, it’s time to pick a location for your party photo booth. At this step, a lot of tutorials out there show you how to actually build a physical photo booth. Like, from lumber and with power tools! But, hello, since this busy mama ain’t got no time for that, I decided that taping a backdrop to the wall would have to do! And, guess what? It was perfect!
When choosing a good location for your diy photo booth, there are a few considerations:
Wall Arrangement
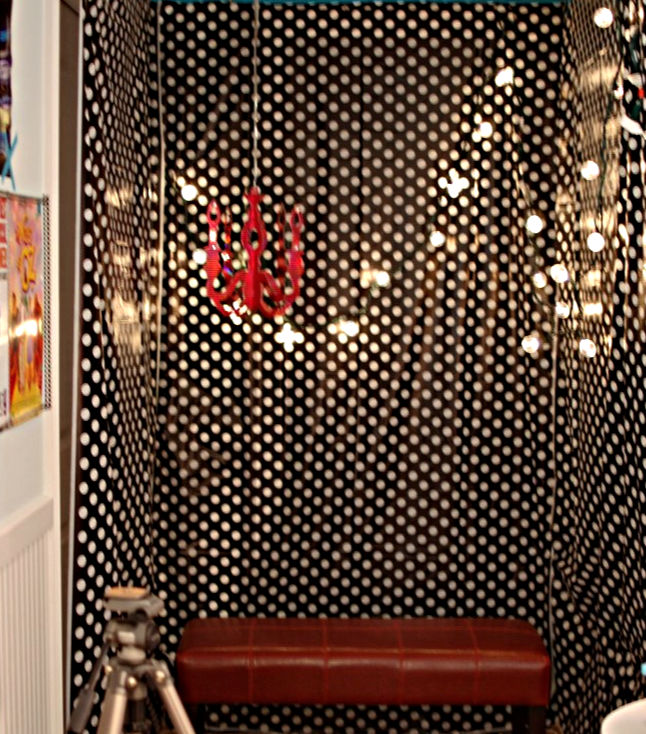
I chose a spot in our home that mimicked a photo booth. It was a long narrow porch, with a wall for the backdrop, and then two walls on each side. I thought this was super clever of me since it meant that I could add matching backdrops to the side walls, and we wouldn’t get bare wall in the photos. However, it also meant that we didn’t get much natural light (see next point). So, as long as you find a spot with enough wall for the backdrop (no side walls), you’ll be fine. You can simply place your tripod tight enough to the backdrop that you don’t get extraneous wall in the view.
Natural Lighting
Lighting is absolutely the most important consideration when picking a spot for your party photo booth. If your party is during the day, you’ll want to take advantage of a natural light source, like a nearby window. Lighting was by far the biggest disadvantage in our location. We used a small area in our developed basement simply because that’s where the birthday party was held.. But if I were to do this again, I would absolutely chose a better lit spot.
Food & Drink Location
Another consideration is to place your party photo booth near the party action! There’s nothing worse than trying to corral a bunch of party goers to an area of the house that doesn’t have food. Or, in the case of us adults, wine, lol! So, if your goal is lots of photos, then place your photo booth near the food and drink table. (But, not so near that it’s at risk of a collision.)
Add your backdrop, seating, lighting, decorations + props.
Once you have a well-lit location, it’s time to add your backdrop to the wall with painter’s tape. I taped ours as close to the ceiling as possible and let it drape to the floor. Next, add your seating in front of the backdrop, place your themed decorations, and add a basket of props nearby. You may need to do some maneuvering once you set up the photo equipment to assure everything is in the viewfinder.
Step 2: Set Up Photo Booth Equipment
What to do: Set up your tripod, camera and ambient lighting in your selected location. Place your remote control nearby, and then fix the settings on your camera so photo booth users can click and shoot.
OK, so now your diy photo booth space is simply gorgeous, it’s time to set up the photo booth equipment. You’ll need to make a couple of choices about your diy photo booth equipment. (Note: As mentioned above, this section assumes you are using DSLR camera.)
Manned or Un-manned Photo Booth?
The first thing you need to decide is whether you want the booth to be ‘manned’ (or wo-manned, lol) by a photographer. If you have somebody who is a decent photographer, and who is willing to take the photos, that might be a good choice. The photographer can choose to use a tripod or not use one. However, I always recommend using one, simply because the photos will be sharper and better lit. And, it adds consistency to the framing of the photos.
The other option, which is the one I used, is to mount the DSLR camera on a tripod so participants can to take their own photos. I went this route because I think participants let their guard down when there’s no photographer yelling “say cheese!”. And, that means you’ll get goofier photos.

Where to place the tripod?
Before you decide on the final spot for the tripod, have somebody be your test participant. Ask them to sit on the bench in front of the backdrop, and have fun with the props while you look through the view finder.
To find the perfect height and position for the tripod, you’ll want to:
- be at face level of the seated test participant (because I can’t imagine the disappointment of reviewing your party photo booth pics later, only to find that you’ve over-shot everybody’s faces!)
- have a wide enough shot to include you whole seating area (otherwise, some people will be cut out of view)
- be close enough to the seating area that you only get backdrop and decorations (not extraneous walls), unless you plan on cropping each photo manually after the party (which sounds like a total bummer, lol)
I highly recommend taping down your tripod to the floor, especially if you are dealing with excited kids. That’s a whole lotta camera sitting atop your tripod, so you’ll want to protect your diy photo booth equipment!
Lighting
Whatever route you choose, the next decision you need to make about your diy photo booth equipment is lighting. This is especially important if your photo booth doesn’t get much natural light, or if your party is at night.
As mentioned, my daughter’s birthday party was in the evening and in our basement which gets little natural light at the best of times. Still, I was reluctant to use a flash because I don’t like the harsh shadows that a flash can cause.
So, I added as much ambient lighting to the area as possible, with a little lamp on the prop table, and the string of mini lights on the backdrop. That was actually enough, and I didn’t need to add my flash or spot lighting. You can also purchase a mini light curtain which could be hung over your backdrop for lots of ambient light.
But, because every space has it’s own variables, I’d recommend testing out different lighting scenarios in advance of your actual event. And, don’t be afraid to increase your camera’s ISO to get a brighter shot. If you do need to use a flash, I’d definitely use a flash diffuser to soften up the shadows.
Remote Shutter Release
OK, friends, whew. So we’ve gotten this far: a location, the photo booth set up, and your equipment is in place. So, at this point, if you aren’t using a photographer, bet you are wondering: “how in the heck do the photos get taken?” Great question!
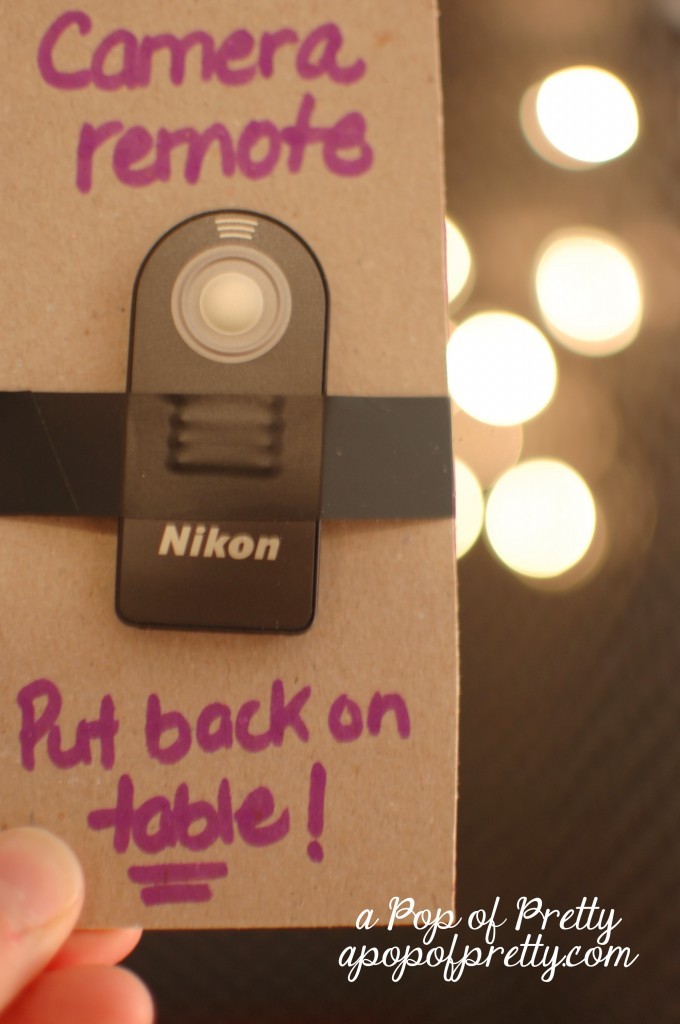
If you opt to go the tripod route which is what I did, this is the best tip EVER for your self-manned party photo booth. Are you ready? There is a magical little gadget that is less than $25 that releases the shutter on your camera, called a remote shutter release. Really, I kid you not!
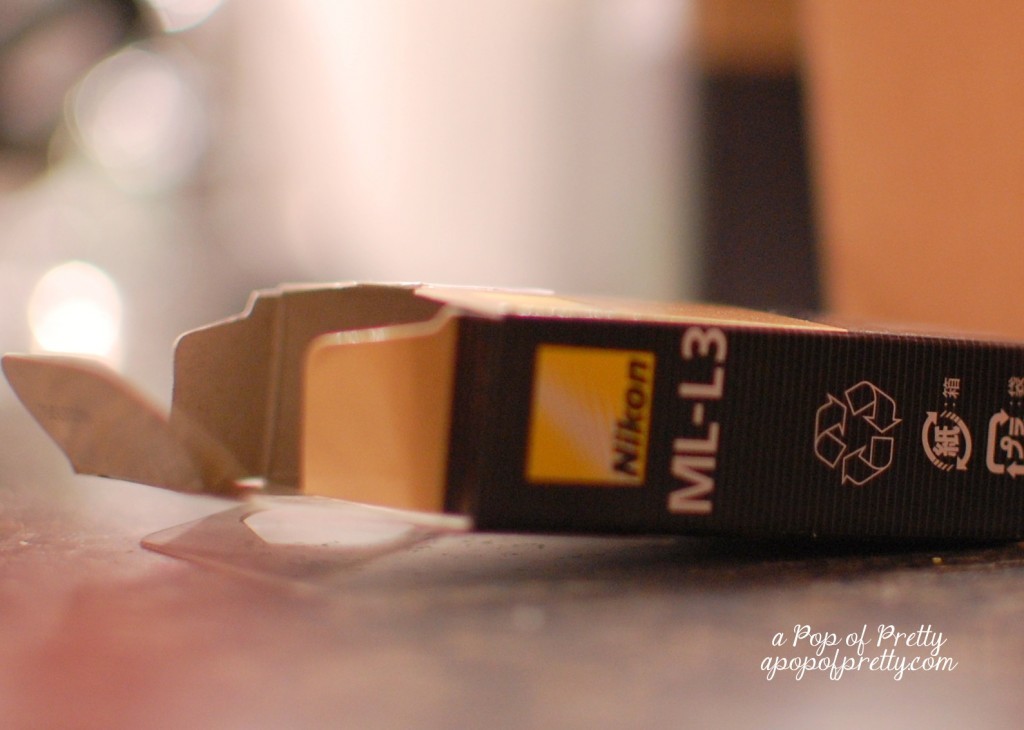
Basically, it’s a wireless remote control for your DSLR. And, it works works up to 16 feet from the camera. I mean seriously, I take a gazillion photos. How did I not know about something so utterly fantastical? I’m a Nikon user, so I purchased the Nikon ML-L3 remote. And, there are compatible versions for the other popular camera brands. Further, I think there are even generic remote release models that work Nikon and Canon.
When photo booth subjects came into our photo booth, they grabbed the remote, got situated on the bench with props, made silly faces, and clicked when they were ready to take the pic! It seriously was as easy as that.
I should mention that this thing is smaller than an Apple TV remote, if that’s even possible. So, if you don’t want to lose it in the midst of all the photo booth fun, I’d recommend taping it to a larger piece of cardboard like I did. It worked like a charm.
Camera Settings
Next, to get the remote shutter release to work, you’ll need to change your DSLR’s settings to remote shooting mode. You’re thinking, “Say wha?”, aren’t ya? I thought the same thing when I read about i. But honestly, it was SO freaking simple.
As I’m a Nikon user, I can show you how to change your Nikon settings. But, if you are a Canon or Sony user, it’s best to google the exact settings for your brand’s particular remote shutter release model. Also, even if you own a Nikon, your camera settings might be a little different. I recommend using You Tube as there are some great videos on how to set up the ML-L3 remote.
Remote Control Settings on my Nikon:
- First, I clicked ‘Menu’.
- Next, I selected the camera icon (‘Shooting Menu’).
- Then, I scrolled down, and selected Remote Control Mode (ML-L3).
- I clicked on that, and once in the Remote Control Mode menu, I selected Quick-Response Remote.
- Now, my camera was set up so that a a photo would be captured as soon as the photo booth participant clicked the remote.

Test it out! Click the remote and you should hear your camera take a photo. So cool, right?
OK, one last thing on the camera settings. Now that you have your camera working with the remote control, you will just need to set it up for the maximum length of time that your camera will recognize the remote.
For example, on my Nikon, this maximum time is 15 minutes. So, that just means you will need to have somebody go reset it at 15 minute intervals, or whatever the maximum time is for your particular DSLR.
Remote Control Timer Settings on my Nikon:
- First, I clicked ‘Menu’.
- Next, I selected the pencil icon (‘Custom Setting Menu’).
- Then, I scrolled down, and selected Timers/AE Lock).
- I clicked on that, and once in the Timers/AE Lock menu, I selected Remote On Duration. Then I scrolled down through the options and chose 15 min.
- Now, my camera was set up so that the remote control would work without interruption for 15 minutes.

Step 3: Photo Viewing & Sharing
What to do: Decide how you want participants to be able to view and share the photo booth photos. Choose among several different options.
When it came to viewing the photos, wondered how I might display or print the photos during the party so that party attendees could see them before they went home. There were certainly a few feasible options, like tethering my laptop to the camera.
But, ultimately, I decided that I’d have to be superwoman to make that happen with everything else I had on my plate at my daughter’s birthday party! If you have somebody who can take on that responsibility, it’s a great idea. But, I opted for a less stressful alternative.
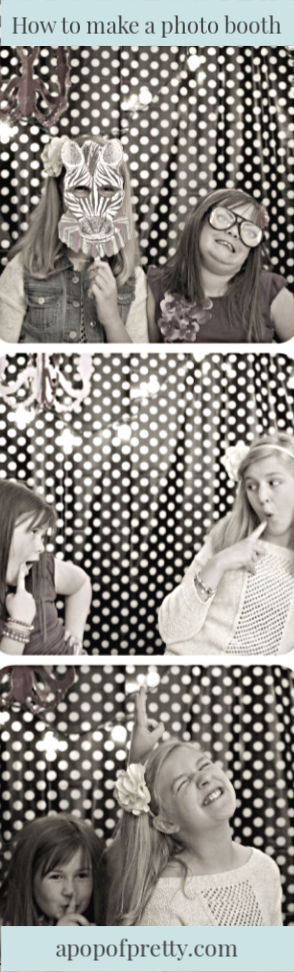
Instead, I reviewed the photos over the following few days, used a collage maker to create photo strips, and e-mailed them out to the girls. Because, let’s face it, printing the photos isn’t as big a deal as it once was! These days, everybody wants the digital photos to share on their social media.
Here are other options for photo viewing and sharing:
- Upload the photos to Dropbox or Google and send everybody the link.
- Create a private Facebook group for party attendees, and upload the photos there.
- If your DSLR has a wireless feature or a wireless adapter, upload photos directly to your iPhone and then Airdrop them to party attendees, and/or display them in a slide show mode on your ipad or TV .
- If your DSLR has a wireless feature, upload photos directly to your iPhone and print them out using a handheld printer like the HP Sprocket.
Shop the Post
Are you wondering where to get your hands on some of the items I talked about in this post? Well, to make things easier for you, I’ve rounded them up over on my Amazon Storefront! Just click on the photo below, and head into the Section called How to Make a Photo Booth. (Please note, that as an Amazon Affiliate, I earn a small commission from qualifying purchases made from shopping links in blog posts. This helps to fund the creation of more tutorials like this one!)
My Photo Booth Shop

Share the Love
Did you find this ‘How to Make a Photo Booth‘ Tutorial helpful? If so, I’d love for you to share it on Pinterest or other social media so that others can find it too! And, if you use the tutorial, come back and tell me how it went. I love getting feedback from blog readers!
Yay! Now You Know How to Make a Photo Booth!
So there you have it: everything you need to know about how to make a photo booth! All that’s left is to test everything out, and work out any kinks BEFORE the party.
This is such a fun idea for any occasion – birthdays, weddings, family reunions, and more. There’s nothing better than making great memories, and having truly memorable photos!
Did I leave anything out? If you have questions, I’ll try my very best to answer them. Just shoot me a line in the comments section!
Until next time,
K.

Hello!
I SO EXCITED TO SEE YOUR BLOG ON PINTEREST, about the DIY photobooth. But for some reason every time I click on click here, part two or step 6 it just brings me back to step one. I am on a phone so I am hoping it’s just a glitch? Hopefully it will work on a computer!
Hmmmm. I will check on that. Thanks for letting me know! ~Kerri
It seems to be working fine. Please let me know if you have any further trouble! Thanks again, Kerri
This is awesome. My sister is pregnant and I’m the god mother so im in charge of the baby shower. Would you reccommend this for the baby shower? It is jack and jill and children will be present.
Absolutely! The kids (and adults) will love it!!
Thanks so much for this tutorial! It was really helpful. I’m planning to make a photobooth for a charity op-shop ball, and I’m so glad I found an easy tutorial. All the other ones I found had me setting up an umbrella and a flash–WAY to complicated!
what is the printing situation with these pictures.
Hi Dani
Because this photo booth was for my daughter’s birthday party, I didn’t set up ‘real-time’ printing; I simply printed them after the fact. But I’ve seen other tutorials out there on how to set up a printing station for events like weddings and things. Try googling it – I hope you find something that is helpful. ~Kerri
Thank you for sharing your info! I used it for my son’s 16th birthday party this weekend. It was a huge hit!!!
Thanks so much!
Oh, I’m so happy that you find the tutorial helpful! It was very nice of you to come back and tell me. Thanks! ~Kerri
I am unable to see your photos. please help…..
I think you might have a browser issue. Open a different browser and it should be OK. ~Kerri
What are your thoughts on connecting a printer? I am thinking about using it for my guest book for my wedding/photobooth during the wedding and want them to be printed? I may just need to keep them on the computer and do something different for the guest book, but I would love your opinion!
Thanks!
I think I read about ways to achieve this while researching diy photo booths, but I decided to keep it simple as I was also running a birthday party at the same time. I’m sure if you google it, you might find a tutorial on how to do this seamlessly. However, the more technology you add, the greater the chances that something will ‘go wrong’, and I don’t think I’d want that worry on my wedding day. It might be better to keep in simple? Kerri
Yahoo! Thanks for this cheap and easy tutorial! I’m making a photo booth for my upcoming ugly sweater christmas party. I want it to be THE party of the year, this will definitely put me in the ranks!! The other tutorials I read were very complicated and had you making an actual, physical photo booth..what the heck would I do with it afterwards?! Store it in the garage and tick my husband off with yet another fun little tool taking up valuable car space?! Thanks a mil!
do you think I can use a nikon shutter release for a canon camera? Or do I need a canon one and if so, do they sell them for canon?
Hmmm…I’m not sure about that. Does Canon have a version? It’s probably best to ask a camera professional, or consult the Canon web site. Sorry I can’t be of more assistance! ~Kerri
OMG! Just made one of these for our annual Halloween party last night! Such a hit and so easy to make. Thanks for your prep work and for sharing it with everyone. We had a ball!!
Love this idea! I have a Nikon DSLR as well, although mine has an auto shut-off after so long?? Did you have any problems with that?
Hi Kerri! I have the same question with the ML-L3 remote!
The longest you can set “Remote On” for Nikon is 15 minutes, once the time expires, you have to reset the camera to detect the remote again. The camera does that to save batteries, but it’s not the greatest feature if / when I need the booth to be ready to go for an entire evening where there might be long periods of inactivity.
Did you have the same problem and how did you solve it?
How much did this cost to make?
I’m not exactly certain, but it wasn’t much (less than $75?), as long as you have the right camera equipment already. The only real costs were the Dollar Store table cloths and the props which you can find or make inexpensively.
You rock! Thank you I will do this for my wedding
I literally let out an audible squeal! This looks like sooo much fun 🙂
Can’t wait to meet you at Haven.